
How to Sew a Diaper | The Stitch That Breaks in Two Weeks
This post contains affiliate links. As an Amazon Associate, we learn from qualifying purchases
Sewing a diaper requires matching three things: the right waterproof fabric (PUL), the correct elastic type and stretch technique, and a 3-step zig-zag stitch set to a 6mm width. Skip the zig-zag or over-stretch the elastic, and the leg gathers will fail within two weeks of washing, causing leaks. The process is less about fancy sewing and more about understanding how these three components interact under tension and heat.
That interaction is mechanical. A straight stitch severs the elastic’s threads; a stitch width under 4mm punches too many holes in it. The elastic isn’t just for fit, it’s a stressed component that fatigues every time the diaper is put on and taken off. Get the mechanics wrong, and the repair is more work than starting over.
What follows: the non-negotiable tools, the stitch settings that prevent breakage, the exact elastic stretch formula from a specialist source, and how to assemble the layers so they actually contain a mess.
Key Takeaways
- Use a 3-step zig-zag stitch at a 6mm width for sewing elastic; a straight stitch or a narrow zig-zag will cut the elastic threads and cause breakage.
- For Lastin elastic, stretch it slightly more than double the length of fabric it’s being sewn to. Over-stretching makes it too tight and prone to snap.
- Never backstitch on Lastin elastic. Start stitching on the inseam without elastic to secure your thread, then begin the elastic before the marked point.
- The outer layer must be PUL (polyurethane laminate) fabric for waterproofing; the inner layer should be a wicking material like microfleece or suedecloth to keep baby dry.
- Test your first diaper with water before committing to a batch. A leak at the leg elastic means your stitch, stretch, or fabric tension is off.
Gathering Your Tools and Materials
You need more than a sewing machine. The wrong fabric or notion turns a weekend project into a pile of leaky scraps. Start with the two critical fabrics.
The waterproof outer shell is almost always PUL. This is a polyester knit with a polyurethane laminate on one side. The laminate side faces out. If you sew with it facing in, the diaper will wick moisture straight through to clothing. You can find PUL by the yard from specialty retailers like Nature Fabrics or Wazoodle. The inner layer, which touches baby’s skin, should pull wetness away. Microfleece is the standard because it’s cheap, easy to sew, and effectively wicks. Some prefer stay-dry suedecloth (a microsuede), but it’s more expensive and can be slippery to handle.
The other non-negotiable is elastic. You have two main choices: braided or woven elastic (like you’d find in clothing) and Lastin (a clear, polyurethane elastic). Lastin is popular for cloth diapers because it’s soft and creates a gentle gather, but it’s notoriously finicky. Braided elastic is stronger and more forgiving for beginners. According to the specialist site Darling Diapers, you’ll want 1/4 inch wide elastic for diapers made from thinner layers; 3/8 inch can be too bulky.
Your tool list is short but specific: – Sewing machine capable of a zig-zag stitch – Size 80/12 universal or microtex needles (sharper is better for piercing PUL cleanly) – 100% polyester thread (it holds up to repeated washing and bleaching better than cotton) – Fabric scissors, clips (not pins, to avoid holes in the PUL), and a safety pin for threading elastic – A reliable cloth diaper pattern, many are available free online. Ensure it includes markings for elastic placement.
The Right Stitch and Elastic Technique
This is where most homemade diapers fail. The stitch isn’t a suggestion. The elastic stretch isn’t a guess. Get these wrong and the diaper is trash after a few uses.
For sewing elastic to diaper fabric, a 3-step zig-zag stitch set to a 6mm width is the industry-standard technique. This stitch moves forward three steps for every one zig-zag, creating a flexible, durable seam that allows the elastic to stretch and recover without breaking the thread. A standard zig-zag or a straight stitch cuts the elastic fibers.
Set your machine. Stitch width: 6mm. Stitch length: a medium setting (around 2.5mm). This combination creates a seam that moves with the elastic. A width shorter than 4mm, as noted in the Darling Diapers guide, “tends to cause too many holes in the elastic,” weakening it at every needle puncture. The 3-step zig-zag is key, it looks like a dashed zig-zag line and is often a separate setting on modern machines.
Now for the elastic. The technique differs completely by type.
For Braided or Woven Elastic:
Stretch it as you sew until it resists, the point where it basically says it’s done. This creates an even gather. Anchor the elastic at the start mark, stretch it to the end mark, and sew. The gather will form naturally behind the presser foot.
For Lastin Elastic:
This is the tricky one. The Darling Diapers guide provides a specific formula: stretch it slightly more than double. Here’s how that works in practice. If the distance between your elastic marks on the diaper leg is 5 inches, you’d pinch the relaxed Lastin about 2.5 inches behind the needle and stretch it to the 5-inch mark. You are making the elastic stretch to cover the fabric length, not gathering the fabric onto the elastic. This method prevents over-tightening, which leads to breakage and red marks on baby’s skin.
Where this goes sideways: Backstitching on Lastin. The guide states “NEVER BACKSTITCH LASTIN.” The backstitch locks the threads, creating a stress point that can’t stretch. When the elastic does stretch in use, that point snaps. Instead, start stitching on the inseam where there’s no elastic, do your backstitches there, then begin the elastic just before the marked point.
Step-by-Step Assembly for a Pocket Diaper
 A pocket diaper is a good first project. It has a simple construction and lets you test your elastic technique without the complexity of an all-in-one style. We’ll assume you have your PUL, inner fabric, and a pattern cut.
Step 1: Create the Pocket Opening.
Place your outer (PUL) and inner (microfleece) fabrics right sides together. For a pocket, you’ll leave an opening at the back waist for inserting an absorbent pad. Sew around the entire diaper using a 3/8 inch seam allowance, but leave a 4-5 inch gap along the back waist. Use clips, not pins, to avoid perforating the PUL. Trim the seams and clip curves to reduce bulk.
Step 2: Turn and Press.
Turn the diaper right side out through the pocket opening. Use a blunt tool like a chopstick to gently push out the curves. Press the entire diaper flat with an iron on a low, no-steam setting. The PUL laminate can melt, so be careful. Topstitch around the entire diaper, about 1/8 inch from the edge, closing the pocket opening as you go. This topstitch gives a clean finish and reinforces the seams.
Step 3: Apply the Leg Elastic.
This is the critical moment. With the diaper inside-out, mark your pattern’s leg elastic lines. – For Lastin: Remember, no backstitching. Start sewing on the inseam, backstitch. Align the start of your elastic just before the first mark. Pinch and stretch using the double-length formula. Sew slowly, keeping the elastic flat and stretched evenly to the second mark. Cut the elastic, tuck the end under, and sew a few stitches to secure. – For braided elastic: Anchor at the mark, stretch to resistance, sew, and secure at the end mark.
Repeat for the second leg. Consistency is key, uneven leg elastic leads to leaks.
Step 4: Apply the Waist Elastic.
The process is the same as the legs, but usually with less stretch. For the back waist, a gentler gather is often more comfortable. For the front waist, you may use a shorter piece with minimal stretch, just enough to contour.
Step 5: Add Closures.
You can use snaps or hook-and-loop tape (Velcro). Snaps are more durable and toddler-proof. You’ll need a snap press and plastic snaps (size 15 or 16 are standard). Follow your pattern’s marking for placement, usually two rows on the front waistband. For hook-and-loop, sew the soft “loop” tape to the front wings and the scratchy “hook” tape to the landing zone.
| Common Mistake | Consequence | Timeline to Failure |
|---|---|---|
| Using a straight stitch on elastic | Thread cuts elastic fibers | 1-2 washes |
| Over-stretching Lastin (>2.5x) | Elastic loses recovery, snaps | 2-3 weeks of use |
| Sewing with hot elastic (right from dryer) | Needle holes enlarge, causing breakage | Next stretch during sewing |
| Incorrect PUL orientation (laminate in) | Diaper wicks moisture, leaks instantly | First use |
Troubleshooting: Leaks, Breaks, and Fit Issues
 Your first diaper might not be perfect. Here’s how to diagnose the problem.
Leaks at the Legs:
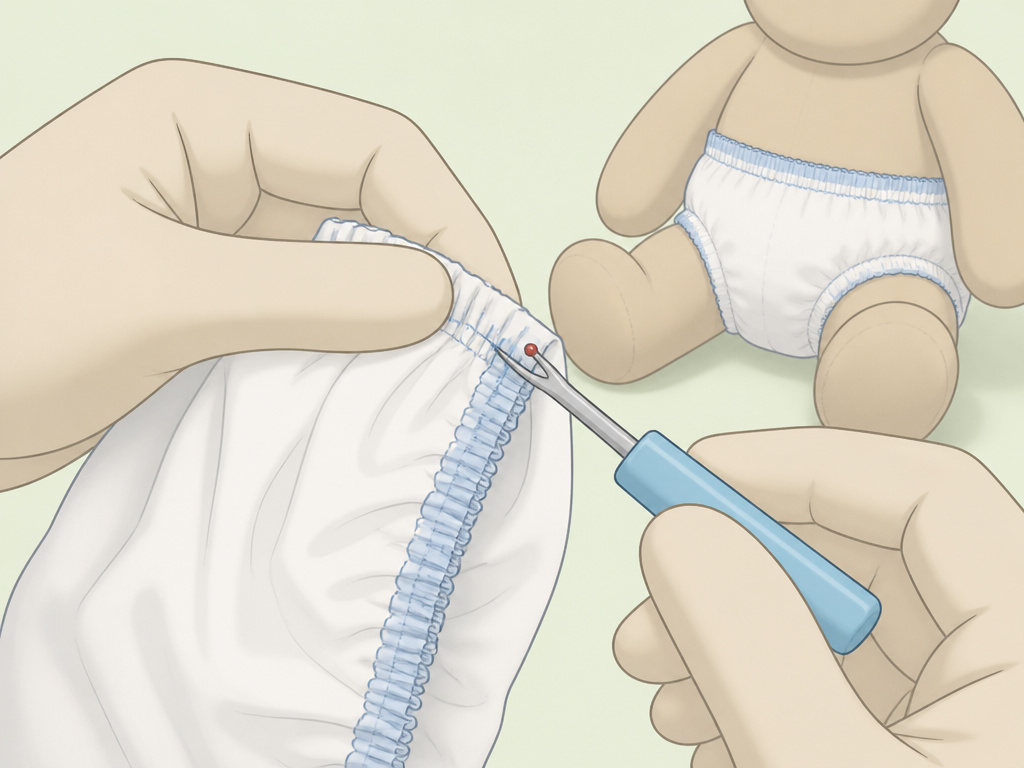
This is almost always an elastic issue. The gathers aren’t tight enough to contour the leg. The fix is to check your stretch technique. Did you stretch the elastic enough? For Lastin, it must be stretched to the fabric length. If the elastic is too loose, the diaper will gap. You’ll have to unpick that section and re-sew. Before you do, test the fit on a stuffed animal or a can to see where the gap is.
Elastic Breaks or Snaps:
If the elastic itself breaks, you likely over-stretched it during sewing or used a stitch that damaged it. Remember, Lastin is weaker when hot. If you sew with elastic fresh from the dryer, the needle holes are more prone to tearing. Let it cool first. If holes are forming along the stitch line, your stitch width is too narrow. Move to a 6mm width.
Diaper is Too Bulky or Stiff:
You might be using too many layers or the wrong elastic. Switch to 1/4 inch elastic if you used 3/8 inch. Ensure you trimmed your seam allowances and clipped curves thoroughly before turning. Bulk can also come from using a thick inner fabric, microfleece is the thinnest common option.
Easy to miss: The EDANA diaper testing protocol recommends conditioning diaper materials before testing to reduce deviations. Let your fabrics and elastic sit out in your sewing room for a few hours before you cut and sew. This lets them adjust to the local humidity and leads to more consistent results.
Fabric and Elastic Comparison
Not all materials are equal. Your choice depends on your sewing confidence and your baby’s needs.
| Material | Best For | Key Consideration |
|---|---|---|
| PUL (Polyurethane Laminate) | Waterproof outer shell | Must have laminate side out. Durable over 100+ washes. |
| TPU (Thermoplastic Polyurethane) | Eco-friendly waterproofing | Softer than PUL, but laminate can be less durable. |
| Wool Interlock | Breathable, natural cover | Requires lanolizing for waterproofing. Not for beginners. |
| Microfleece | Inner, stay-dry layer | Cheap, wicks well. Can pill over time. |
| Suedecloth | Inner, stay-dry layer | More expensive, very smooth against skin. Slippery to sew. |
| Lastin Elastic | Soft, gentle leg gathers | Requires precise stretch technique. Breaks if mishandled. |
| Braided/Woven Elastic | Beginners, waistbands | Forgiving and strong. Can create a tighter, less flexible gather. |
If you’re new to sewing diapers, start with PUL, microfleece, and braided elastic. It’s the most forgiving combination. Once you master the cloth diaper folding and sewing basics, experiment with Lastin for a custom fit. The right cloth diaper properties, absorbency, fit, and breathability, are built layer by layer.
Before You Go: The One-Diaper Test
Don’t sew a whole stash based on one pattern. Sew one diaper. Test it thoroughly. 1. Water Test: Lay it flat in an empty sink. Pour 1/4 cup of water into the center. Watch for leaks at the seams and leg elastic. If it leaks, your stitch tension or seam allowance is off. 2. Fit Test: Put it on a doll or a similar-sized object. Check for gapping at the legs and waist. The elastic should create a gentle seal without digging in. 3. Wash Test: Run it through your normal diaper bag care routine, hot wash, dry on medium. Inspect the elastic and seams. Has the elastic relaxed too much? Have any stitches popped?
This test run saves you hours of unpicking later. The goal isn’t just a diaper that looks right, but one that performs through the messy reality of changing newborn diapers. The process of changing a diaper will stress every seam and gather you sewed.
Frequently Asked Questions
What is the best stitch for sewing diaper elastic?
Use a 3-step zig-zag stitch set to a 6mm width. This specific stitch creates a flexible, durable seam that allows the elastic to stretch without breaking the threads. A straight stitch will cut the elastic, and a standard zig-zag may not be strong enough.
How much should I stretch Lastin elastic?
Stretch Lastin slightly more than double the length of the fabric you are sewing it to. For example, if the leg opening is 5 inches long, pinch the relaxed Lastin 2.5 inches behind the needle and stretch it to the 5-inch mark. Over-stretching makes it too tight and prone to snap.
Can I use a regular sewing needle?
You can, but a Size 80/12 Microtex or Sharp needle is better. It has a finer, sharper point that pierces the PUL and elastic cleanly, reducing the chance of creating large holes that weaken the material, especially with Lastin.
Why does my homemade diaper leak at the legs?
Leaks at the legs are almost always due to incorrect elastic application. The elastic either wasn’t stretched enough during sewing (leaving a gap) or was sewn with the wrong stitch (causing it to break or not recover). Check your stretch technique and ensure you’re using the correct zig-zag stitch.
What’s the difference between a pocket diaper and an all-in-one?
Pocket diaper has a sleeve (pocket) between the waterproof shell and the inner lining where you insert an absorbent pad. An all-in-one (AIO)** diaper has the absorbent layers sewn directly inside, so it’s used like a disposable. Pocket diapers are easier to sew, dry faster, and allow you to customize absorbency.
How do I prevent the elastic from breaking?
Avoid backstitching on Lastin, never sew with elastic that’s still hot from the dryer, and use the correct 6mm wide zig-zag stitch. Also, follow the specific stretch formula, over-stretching is a primary cause of breakage. Starting with a more forgiving braided elastic for your first few diapers can build confidence.
The Bottom Line
Sewing a diaper is a practical skill that hinges on three mechanical truths: the zig-zag stitch flexes, the elastic must be stretched to a precise formula, and the waterproof layer has a right side and a wrong side. Get those right, and you have a diaper that lasts. Get them wrong, and you have a leaky project. Start with one pocket diaper, use braided elastic, and master the 3-step zig-zag. Your first one might not be perfect, but it will teach you more than any guide. Then you can move on to matching diaper cover styles or even designing your own homemade diaper bag. The goal is a functional diaper that makes the routine of changing a poopy diaper just a little bit easier.
