
DIY Diaper Bag Tutorial: How to Make Your Own Custom Bag
This post contains affiliate links. As an Amazon Associate, we learn from qualifying purchases
To make a diaper bag, you either customize a pre-made bag with organizer pouches or sew one from scratch using durable, wipeable fabric like polyester or PUL. The core design must include a wipe-clean interior, an insulated pocket, and a dedicated, padded changing pad compartment. Skipping the insulated pocket means cold bottles or warm purees within an hour.
That answer covers the two paths. The first path, customizing a store-bought bag, is where most parents should start. It’s faster, and you can leverage a bag’s existing structure, like the 29-liter capacity of the LIINI NAPPY backpack. The second path, sewing, gives you total control over materials and compartment sizes, but it demands specific techniques when working with waterproof liners.
What follows is a breakdown of the three features that matter more than style, a direct comparison of the customization versus sewing routes, and the exact steps to sew a critical component: the waterproof wet bag liner. By the end, you’ll know which project fits your weekend and your baby’s needs.
Key Takeaways
- The most functional diaper bags have a wipe-clean interior lining, an insulated bottle pocket, and a separate, padded changing pad compartment.
- Customizing a good-quality bag with organizer pouches is faster and more reliable than sewing a full bag from scratch for most people.
- If you sew with waterproof fabric (PUL, laminated cotton), use clips, not pins, the needle holes won’t close and will leak.
- Manufacturer warranties, like LIINI’s 24-month coverage, often exclude damage from machine washing and normal wear and tear.
- For a DIY travel crib bag like the ORBAGCRGRYA model, respect the 15kg weight limit and check the frame latches regularly.
The 3 Non-Negotiable Features of a Functional Diaper Bag
You can make a bag from the prettiest canvas, but if it misses these three engineered features, you’ll be wrestling with it daily. These aren’t just nice-to-haves; they’re the specs that turn a bag from a container into a tool.
A functional diaper bag integrates a wipe-clean liner, a thermally insulated pocket, and a dedicated changing pad compartment that protects the pad from contamination. This combination addresses the primary use cases: containing messes, preserving food temperature, and providing a clean changing surface anywhere.
First, the interior must be wipe-clean. Polyester or faux leather linings, like those used in the LIINI NAPPY backpack, are standard because a damp cloth removes puree smears and dried milk. A cloth lining absorbs spills, and the smell lingers after the third incident.
Second, you need a true insulated pocket. It’s not a regular pocket. It uses a thin layer of foil-backed foam or batting to keep a bottle cold for 2-3 hours or a container of food warm. Without it, a refrigerated bottle reaches room temperature in under an hour on a summer day. This is non-negotiable if you’re out for more than a quick errand.
Third, the changing pad needs its own home. A simple sleeve isn’t enough. The compartment should be padded to protect the pad from being bent or crushed by other items, and it must be separate from the main storage area. A soiled onesie should never touch the pad you’ll lay your baby on. Many high-capacity diaper bags fail here, stuffing the pad in with everything else.
| Feature | Why It’s Required | Compromise Consequence |
|---|---|---|
| Wipe-Clean Lining | Contains and allows for quick cleanup of inevitable spills. | Stains and odors set into fabric, making the bag unpleasant to use within weeks. |
| Insulated Pocket | Maintains safe temperature for milk or food for 2+ hours. | Bottles warm/cool too fast, limiting trip length or requiring a separate cooler. |
| Dedicated Pad Compartment | Keeps the changing surface clean, protected, and easy to access. | Pad gets dirty or bent, forcing you to change a baby on an unclean or lumpy surface. |
If you’re assessing a bag to customize, these three features are your checklist. If you’re planning to sew, these are the design challenges to solve first.
Customize a Bag vs. Sew One From Scratch: Which Project Is Yours?
This is the main decision. One path takes an afternoon, the other takes a weekend and intermediate sewing skills. Your choice depends on whether you want a perfect bag or a perfect-for-now bag.
The Customization Route (Faster, More Reliable)
Find a good diaper bag that has the core structure and features you like, maybe a backpack style or a tote, but whose internal organization isn’t quite right. Your job is to augment it, not rebuild it.
Start with a set of diaper bag organizer pouches. These are clutch. Get a few clear ones for wipes and pacifiers, a small insulated one for snacks, and a larger zippered one for diapers and creams. Dropping these into the main compartment of any bag instantly creates a modular system. You can lift the entire “diaper station” out and move it to a stroller basket or another bag in seconds. This approach works with backpack diaper bags, tote diaper bags, and even large handbags.
The advantage is reliability. You’re using a bag whose seams, zippers, and straps are professionally finished and stress-tested. You’re adding the organization layer yourself. It’s how you get a highly functional system without touching a sewing machine. For a deep dive on setting this up, our guide on how to organize a diaper bag walks through the pouch strategy.
The Sewing Route (Total Control, Higher Difficulty)
Sewing a full diaper bag from scratch is a serious project. You are engineering a 3D object that will carry weight, withstand abrasion, and contain messes. It’s not just sewing squares together.
You need to source specific materials: a sturdy outer fabric (canvas, cordura), a waterproof inner liner (PUL fabric or laminated cotton), insulated batting, heavy-duty zippers, and robust webbing for straps. The construction involves boxing corners, setting zippers in gussets, and creating padded sections. Without a commercial pattern and some sewing experience, the result can be flimsy or awkward to carry.
Where this goes sideways: Using pins on waterproof fabric. If you use PUL or vinyl, pins leave permanent holes that won’t seal, creating tiny leaks in your liner. You must use fabric clips instead.
However, sewing is the only way to get a truly custom size, pattern, or feature set. It also makes sense for sewing specific components, like a wet bag liner, which is a fantastic beginner project that adds huge utility to any diaper bag.
Bottom line: Customize first. Sew a full bag only if you have the skills, time, and a specific vision you can’t find in the many various types of diaper bags already on the market.
How to Sew a Wet Bag Liner (A Perfect Beginner Project)
A wet bag is a waterproof pouch you use inside your diaper bag to isolate dirty clothes, soiled diapers, or wet swimsuits. It’s the single most useful DIY item you can make, and it teaches you how to handle waterproof fabric. Here’s how.
You’ll need:
- Waterproof interior fabric (PUL or Pellon 102 Matte Vinyl Fuse ironed onto cotton)
- Outer fabric (quilting cotton or canvas)
- A plastic zipper (at least 2 inches shorter than your fabric width)
- Fabric clips
- A strap (optional, 2″ x 12″ of outer fabric)
Step 1: Cut your fabric. Decide on your finished size. For a standard wet bag, cut two squares each from your outer and inner fabric. A 14-inch square is a good start. If using a 13-inch zipper, this gives you a half-inch seam allowance on each side.
Step 2: Baste the zipper. This is the key step. Create a fabric sandwich: inner fabric right side up, zipper right side down on top, outer fabric right side down. Align all top edges. Use clips, not pins. Sew a 1/8 inch seam to baste them together. Flip the fabrics open, the zipper is now sandwiched between the pretty outer and waterproof inner. Topstitch along the edge for a clean finish. Repeat for the other side of the zipper.
Step 3: Assemble the bag. OPEN THE ZIPPER HALFWAY. This is critical. If you sew it closed, you won’t be able to turn it right-side out. With outer fabrics facing each other and inner fabrics facing each other, sew around three sides with a 1cm seam allowance, leaving a 4-inch gap on the bottom of the inner fabric.
Step 4: Finish. Trim the corners, turn the bag right-side out through the gap in the inner fabric, and push out the corners. Hand-stitch or machine-stitch the gap closed. Push the inner fabric down into the outer shell. You now have a double-layered bag with a waterproof interior.
This wet bag can be dropped into any main compartment. It contains leaks and odors completely, protecting the rest of your bag. Making a few in different sizes is the most efficient way to add custom utility.
Critical Material Choices: What Holds Up and What Just Looks Good
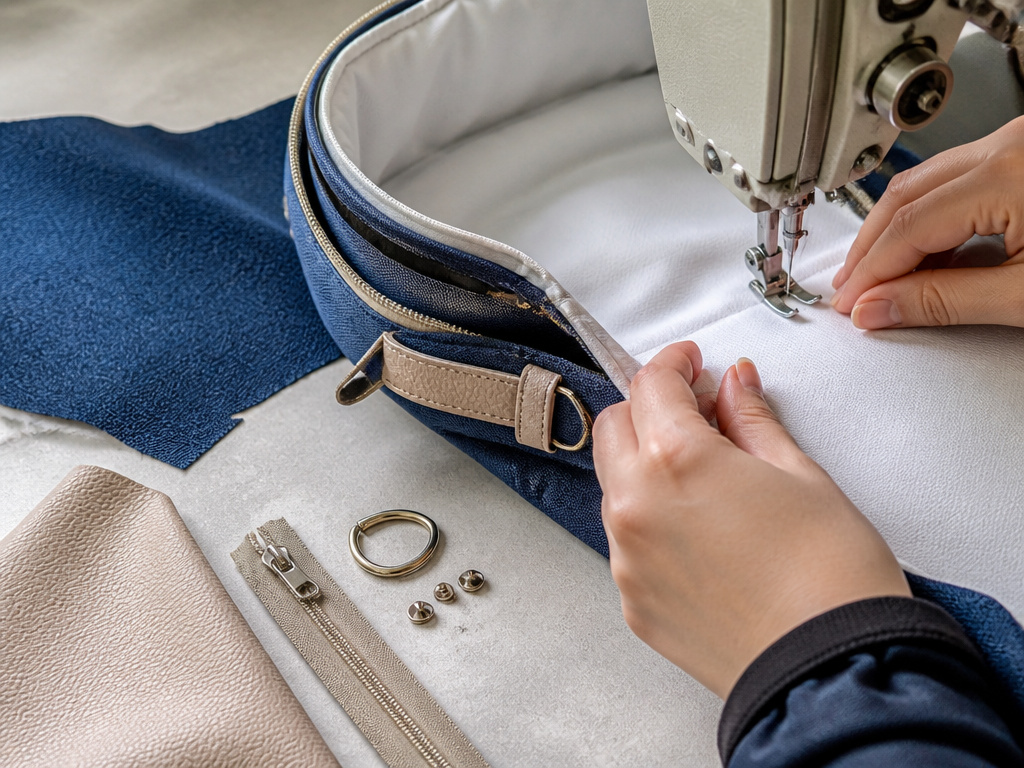
Your material selection decides whether your DIY bag lasts a month or two years. The research is clear: some materials are for show, others are for go.
For the exterior, durability is key. Polyester blends, like the one used in the LIINI backpack, are strong and resist staining. Canvas is classic but can be heavy. Vegan faux leather looks sharp but may scuff over time. The choice is about weight versus wear.
For the interior, you need a barrier. PUL fabric (polyurethane laminate) is the gold standard for DIY. It’s a knit backing with a waterproof laminate, it’s flexible, and it can be sewn. Pellon 102 Matte Vinyl Fuse is an alternative, it’s a vinyl sheet you iron onto any woven fabric to make it waterproof, good for custom prints. True laminated cotton is beautiful but the laminate can crack along seams if not handled gently.
Hardware matters just as much. Use plastic zippers for wet bags or liners, they resist corrosion and can be cut to size with scissors. For main compartment closures, metal zippers are stronger. All stress points (strap anchors, D-rings) need to be reinforced with bar tacks or extra rivets.
Common mistake: Machine-washing a bag not built for it. The LIINI warranty explicitly excludes defects from improper cleaning like machine washing. The agitation can delaminate waterproof linings, warp plastic frames, and shred internal seams. Spot clean or hand wash only.
These aren’t just cosmetic choices. They are the difference between a project that feels rewarding in week one and one that remains functional in year two.
The Integrated Travel Crib: A Specialized DIY Warning
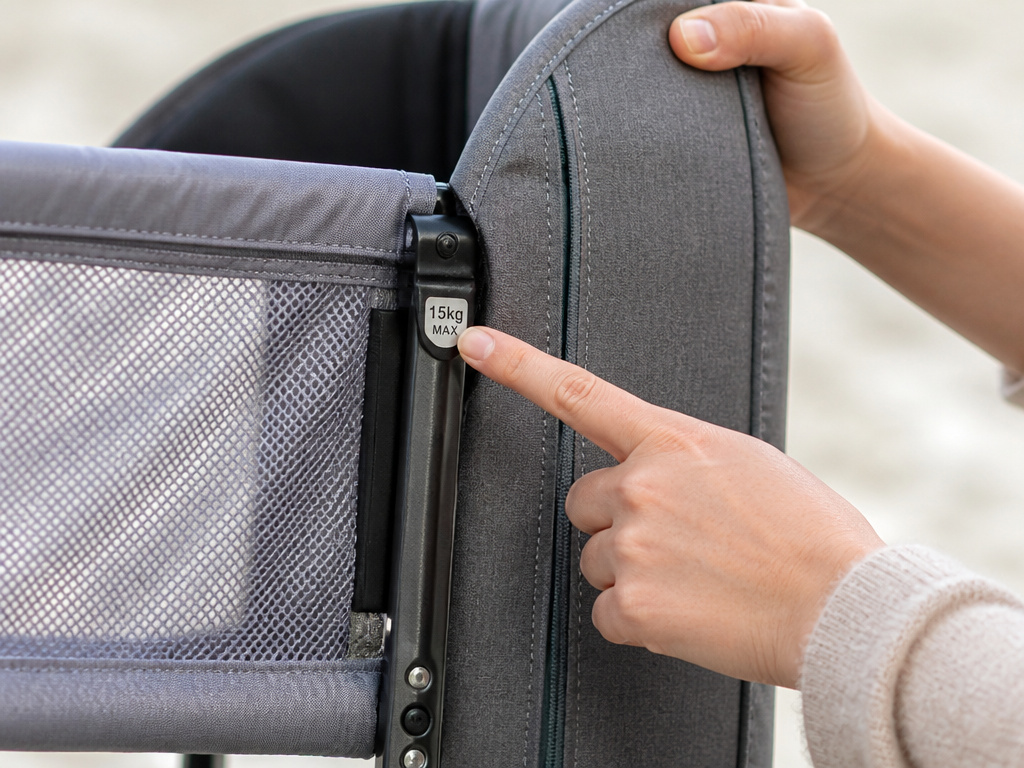
Some commercial bags, like the ORBAGCRGRYA 2-in-1 model, integrate a travel crib. This is a highly specialized feature that is extremely difficult and risky to DIY. The patent for such designs (US6298993B1) highlights the engineering involved: a support assembly that holds the bag open, integrated frames, and a safe sleeping surface.
If you have a bag like this, maintenance is your only safe DIY. The user manual stresses regular checks for tears in the material and loose or broken latches. It also states a 15kg weight limit for the crib. Exceeding that stresses the frame unpredictably.
For a homemade bag, attempting to integrate a sleeping space is a serious safety hazard. The risk of collapse, suffocation, or entrapment is too high. This feature is best left to professionally engineered products that have passed safety testing. Your DIY efforts are better spent on the storage and organization elements, where failure is an inconvenience, not a danger.
Frequently Asked Questions
Can I use a regular backpack as a diaper bag?
Yes, absolutely. Many parents use a functional backpack model as a diaper bag. The key is adding organization. Use a set of diaper bag organizer pouches to compartmentalize items inside the main cavity. You’ll also need to add a portable changing pad and a separate insulated lunch bag for bottles. It works, but it lacks the dedicated, wipe-clean features of a purpose-built bag.
What is the best fabric to line a homemade diaper bag?
Use PUL (Polyurethane Laminate) fabric. It’s the standard for cloth diapers and wet bags because it’s waterproof, flexible, and durable enough for sewing. It comes in prints and solids. Avoid using regular cotton or flannel as a liner, it will absorb leaks and become permanently stained and smelly.
How big should a DIY diaper bag be?
Aim for a capacity between 20 and 30 liters. The LIINI NAPPY backpack offers a 29-liter capacity, which its manual shows can hold 10 diapers, wipes, bottles, a change of clothes, and other essentials. Much smaller and you can’t fit everything; much larger and it becomes cumbersome to carry when full. Scale your dimensions to hit this volume.
Is it cheaper to make or buy a diaper bag?
It depends. If you need to buy a sewing machine and all materials, making a bag will be more expensive than buying a budget model. If you already sew and have some supplies, you might save money versus a high-end bag. However, the real value in DIY is customization, not cost savings. The value in buying is immediate reliability and features like integrated stroller straps.
How do you clean a homemade diaper bag?
Spot clean the exterior with a damp cloth and mild soap. For the interior waterproof liner, you can wipe it out or, if it’s removable, hand wash it in cool water and air dry. Never machine wash or tumble dry a DIY bag unless every material you used is explicitly rated for it. Heat and agitation can destroy waterproof laminates and loosen seams.
Before You Go
Making a diaper bag means choosing between customization and creation. For most, the winning move is to pick a well-built bag, like a diaper bag backpack with a solid warranty, and modify its interior with pouches. It’s fast, reversible, and leans on professional construction where it counts.
If you sew, start with a wet bag. It teaches you the crucial rules of waterproof fabric without the complexity of a full bag. Whether you buy or build, always prioritize a wipe-clean interior, a real insulated pocket, and a clean home for the changing pad. Those three features do more for your daily grind than any designer label ever will.
