
How to Potty Train a 4 Year Old | The 3-Day Plan That Works
This post contains affiliate links. As an Amazon Associate, we learn from qualifying purchases
Potty training a 4-year-old requires a clear, adult-led plan focused on consistency over a short, intensive period. You need a 3-day block dedicated solely to training, a defined reward system, and a protocol for handling accidents that involves immediate, non-punitive practice. For children with developmental delays, the target is a developmental age of 18–24 months or a chronological age of 4 with no medical concerns.
The 3-day timeframe isn’t arbitrary. It’s the minimum window needed to break the diaper habit and install a new bathroom routine before resistance sets in. A four-year-old has entrenched patterns, so a slow, casual approach often entrenches them further.
What follows is the operational blueprint: the supplies that cut frustration, the exact sitting schedule that builds cooperation, the reward strategy that actually motivates, and the accident response that teaches instead of shames. This works for typically developing children who are just late to the game, and it’s the foundational method adapted for kids with additional needs.
Key Takeaways
- Dedicate a minimum 3-day block where you can focus solely on training, no outings, no distractions.
- Use a first-then visual (“First potty, then sticker”) and give the reward immediately every single time.
- Start by practicing sitting for just 5 seconds, 6–8 times a day, and gradually increase the time.
- For accidents, implement “positive practice”: guide the child to the bathroom, sit for 5 seconds, return to the accident site, repeat 5 times.
- If your 4-year-old has developmental delays, a developmental age of 18–24 months is the key readiness indicator, not the absence of interest.
Why a 4-Year-Old Is a Different Challenge
A four-year-old isn’t just an older toddler. They have stronger opinions, more sophisticated avoidance tactics, and a well-established comfort zone with diapers. The common advice to “wait for readiness signs” can backfire here, as some children will never show a clear interest. Research from the Oxford Health NHS Foundation Trust states that “toilet training should not be delayed because a child does not show an interest.” Their bladder and bowel send full signals, but they lack the routine to respond.
The goal shifts from catching a window to intentionally creating one. Your leverage is their ability to understand simple commands and their desire for tangible rewards. The process is less about developmental readiness and more about behavioral follow-through.
Where this goes sideways: Using a slow, child-led approach with a resistant four-year-old. It reinforces the power struggle, and you’ll be “trying” for months with no progress.
The Readiness Redefinition
For a typically developing four-year-old, look for practical readiness, not just interest. Can they follow a one-step direction like “sit down”? Can they pull their own pants up and down with minimal help? Are they dry for stretches of 1.5 to 2 hours? These are the functional skills that matter.
For a child with developmental delays, the Kennedy Krieger Institute training guide provides a clear benchmark: a developmental age of 18 to 24 months, or a chronological age of 4 years with no contributing medical concerns. This reframes the entire question. If your child meets that developmental-age threshold, they are ready for a structured program, even without the typical signs.
The Non-Negotiable Supplies
You can’t run a drill without the right gear. This isn’t about fancy gadgets; it’s about removing physical barriers to success.
| Supply | Purpose | Why It Matters |
|---|---|---|
| Potty Chair or Toilet Insert + Footstool | Creates a stable, supported sitting position. | Knees must be higher than hips for proper bowel emptying. A footstool prevents dangling and gives a sense of security. |
| Visual Timer | Defines the sitting duration objectively. | Takes the “are we done yet?” out of your hands. A 5-second or 1-minute timer is a clear, non-negotiable signal. |
| Special Rewards | Provides immediate, high-value motivation. | The reward must be exclusive to toileting success and given instantly upon any effort. |
| Multiple Pairs of Easy-On Underwear | Simplifies clothing changes. | Elastic waists, no buttons. You’ll go through 6-10 pairs a day. Practice dressing skills beforehand. |
| Wet Wipes & Gloves | Makes clean-up efficient and less aversive. | For you. This is a practical tip that preserves your sanity during the inevitable accidents. |
The potty chair versus toilet debate has a simple answer: use what your child will sit on. Some kids prefer the independence of a small potty; others want to be “big” and use the real toilet with an insert. For children with physical disabilities, an occupational therapist can recommend specialist seats or supports.
The Core 3-Day Training Method
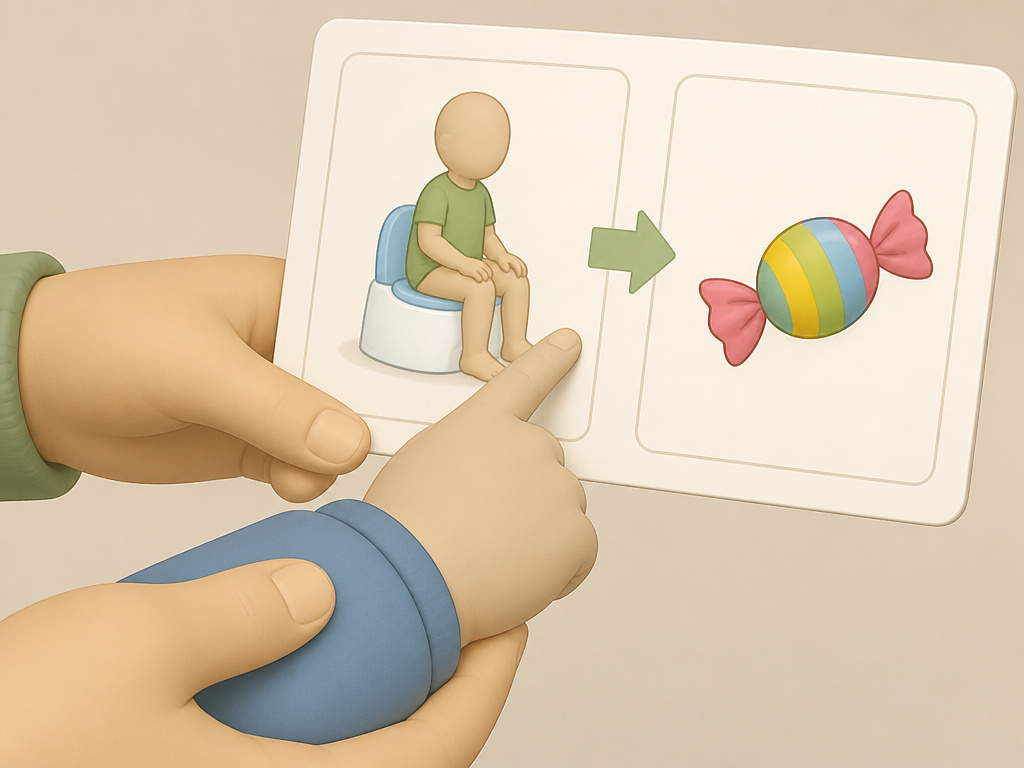 This is the engine. You clear your calendar for a long weekend. You tell your child diapers are gone (except for naps and night). You commit.
Day 1 is practice, not performance. You are teaching the routine, not expecting results. 1. Initiate the routine. Use a declarative statement: “It’s time to sit on the potty.” Don’t ask. Prompt them to make a request if they can (“Potty?”). 2. Guide them to the bathroom. Show a first-then visual card. “First sit on potty, then M&M.” 3. Sit for 5 seconds. Set the visual timer. Your initial goal is cooperative sitting, not elimination. Hold them gently if needed, then gradually reduce your support over the day. 4. Praise and reward instantly. The timer beeps, they get up, they get the reward. Every single time. This builds the association.
Limit time on the potty chair to five minutes. If nothing happens, let them get off. Forcing a longer sit turns it into a battle and teaches them to hold it.
Days 2 and 3 are for reinforcement. You increase the sitting time gradually, aim for one minute per year of age, so about four minutes. You follow the same 6–8 scheduled sits per day: on waking, after meals, before bath. The NIH toilet training research article notes that structured methods like this, which focus on scheduled sittings, have demonstrated success in achieving continence.
The schedule is your best tool. It creates predictability, which reduces anxiety for both of you.
Crafting a Reward System That Actually Works
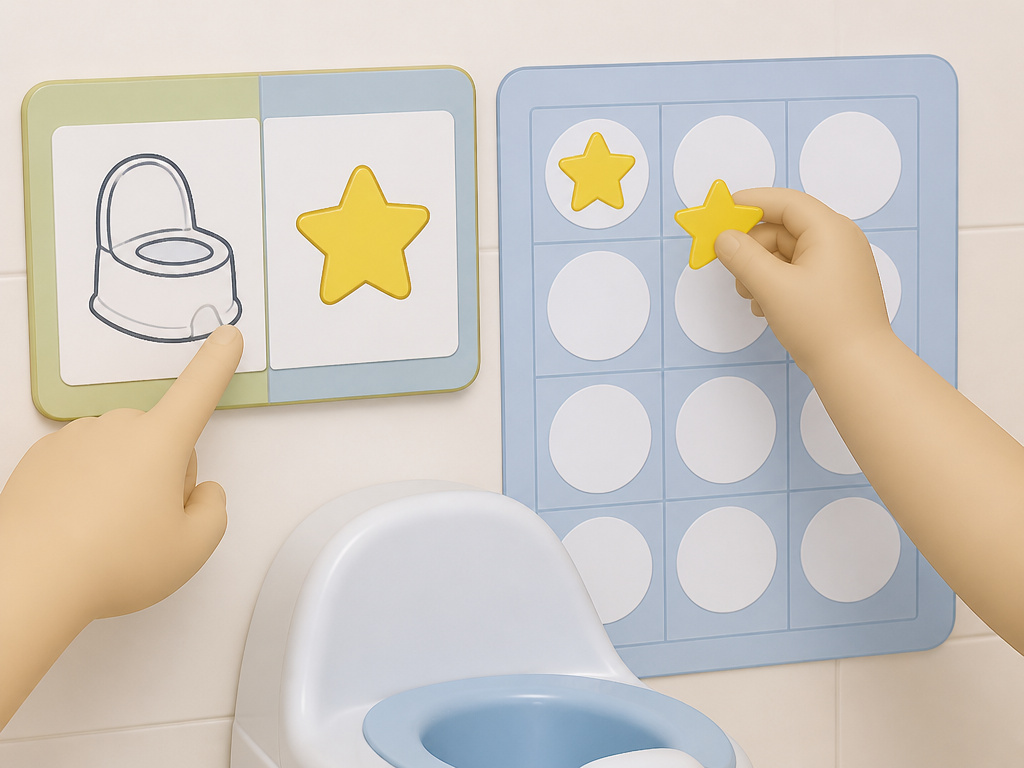 Vague praise doesn’t cut it with a four-year-old. The reward must be concrete, immediate, and exclusive.
Choose one or two high-value items. A special sticker, a chocolate chip, two minutes of a favorite show. Crucially, the child cannot access this reward any other way during the training block. If the reward is fruit snacks, they don’t get fruit snacks at snack time.
Use a first-then visual card every time. This isn’t a chart for later. It’s a direct, in-the-moment contract. You point: “First potty, then sticker.” Then you follow through the second the timer goes off, regardless of whether they produced anything. Initially, you reward the sitting behavior itself.
Transition the reward. Once they are reliably sitting and starting to have successes in the potty, shift the reward to only be given for actual urination or a bowel movement. A potty training chart becomes useful here for tracking successes and working toward a larger goal, like a new toy.
This system provides the clear, immediate feedback that a preschooler’s brain understands. For more on this, our guide on effective reward strategies dives deeper into choosing and phasing out incentives.
Handling Accidents Without Shame
Accidents are data, not failure. They mean the bladder signal hasn’t yet connected to the bathroom routine. Your response should be neutral and instructional.
The “positive practice” protocol from the Kennedy Krieger guide is specific and effective: 1. The moment you discover an accident, calmly say, “Pee goes in the potty.” 2. Guide the child to the bathroom. 3. Have them sit on the toilet for 5 seconds. 4. Walk them back to the spot of the accident. 5. Repeat steps 2 through 4 for a total of 5 times.
It should not be fun. It’s a calm, repetitive drill that physically practices the correct path from accident site to toilet. This is far more effective than scolding, which creates anxiety and hiding.
Common mistake: Putting the child back in a diaper or pull-up after an accident. This teaches that accidents lead to the comfortable default. Stay in underwear.
For persistent accidents, a Wet-Stop alarm can be a useful tool. This moisture-sensitive device clips to the underwear and sounds an alarm at the first sign of wetness, helping the child make a faster connection between the sensation and the event.
If you’re facing a sudden backslide after previous success, you’re likely dealing with a potty training regression, which has different triggers like stress or illness.
Adaptations for Stubbornness or Additional Needs
The core method remains, but the emphasis changes.
For the stubborn toddler engaged in a power struggle, you must remove the struggle. You do this by making the routine utterly boring and inevitable. You are a calm, boring robot following the schedule. The alternative, sitting in wet clothes, is naturally unpleasant. Your tone stays neutral: “Pants are wet. We sit on the potty now.” Our article on strategies for a stubborn toddler offers more tactics for defusing resistance.
For children with autism, sensory issues, or developmental delays, consistency and clarity are even more critical. * Use a full visual schedule. Picture cards for each step: pull down pants, sit, wipe, flush, wash hands. * Give one instruction at a time. “Get toilet paper” (wait). “Wipe” (wait). “Throw paper in toilet” (wait). * Manage sensory barriers. The sound of the flush, the feel of the seat, the texture of toilet paper can be overwhelming. Address these one by one, use flushable wipes, a soft seat cover, or practice flushing with ear protection.
The principle from the Paediatric Bladder Bowel UK guide is key: many children with additional needs won’t show classic readiness signs, but they can learn with a calm, consistent, adult-led routine. Starting early with this routine helps build the skill over time.
What Comes After the 3 Days?
The intensive block gets the habit started. Mastery takes weeks.
Promote independence. Once they are going reliably, teach the downstream skills in sequence: pulling pants up/down, wiping (for teaching independent wiping, start with front-to-back assistance), flushing, and hand washing. Use the same visual schedule.
Generalize the skill. Practice using different bathrooms, at grandma’s house, at the store. The goal is for the skill to be location-independent.
Night training is separate. Wait until daytime is completely mastered, with few accidents and self-initiation. Many children aren’t physiologically ready for night dryness until age 5, 6, or even 7. Use a waterproof mattress pad and consider it a separate project.
Know when to seek help. If your child is developmentally 5 or older and still having two or more daytime accidents per week, consult your pediatrician or a specialist to rule out medical issues like constipation or a urinary tract infection.
Frequently Asked Questions
My 4-year-old refuses to sit. What do I do?
Start smaller. The goal is cooperative sitting, even for 3 seconds. Gently hold them on the seat for the duration of the timer, then immediately release and reward. Over successive attempts, reduce your hold by inches until you’re just standing nearby. The reward only comes if they are cooperative (not screaming/thrashing). If they are excessively upset, end the session and try again at the next scheduled time.
Should I use pull-ups during the day?
No. Pull-ups feel like diapers. They absorb the wet sensation, which removes the natural consequence of an accident. Use underwear during your training days. The only exceptions, per expert guides, are for long car rides and nighttime sleep during the initial phase.
How is this different from potty training a 3-year-old?
The core method is similar, but a 4-year-old often has more entrenched habits and verbal resistance. The reward may need to be more tangible, and the parent’s commitment to the schedule must be more unshakable. For the specifics of a slightly younger child, see our guide on potty training a 3-year-old.
What if my child holds their poop?
This is common. Ensure they are not constipated, increase water, fiber (prunes, pears). Have them sit on the potty at a predictable time, usually 20-30 minutes after a meal, when the body’s gastrocolic reflex is active. Use a footstool to get their knees above hips, the optimal position for evacuation. For dedicated strategies, our article on encouraging pooping can help.
How do I know when they are fully potty trained?
The definition of fully potty trained means the child reliably self-initiates trips to the bathroom, manages their clothing, wipes effectively, and has fewer than one accident per week, all without reminders. Day and night training are assessed separately.
The Bottom Line
Potty training a four-year-old is a short-term project that demands long-term consistency. You provide the unwavering structure, the schedule, the visuals, the immediate rewards. They provide the cooperation, which you shape through practice. Ditch the waiting game. Clear three days on your calendar, gather your supplies, and follow the drill. The resistance you meet is just old habit; your consistency is the new routine that will replace it.
