
Accidentally Washed a Diaper? Here’s What to Do Immediately
This post contains affiliate links. As an Amazon Associate, we learn from qualifying purchases
If you wash a disposable diaper, stop the cycle immediately. The absorbent polymer gel inside will flood the drum, stick to every surface, and potentially jam the drain pump. Unplug the machine, remove the wet laundry and visible gel by hand, then run multiple empty hot-water cycles with vinegar to flush the residue. Check the drain pump filter last.
That gel isn’t just a nuisance. It’s designed to hold hundreds of times its weight in water, and once released in a washer, it coats sensors and narrow passages. Letting a full cycle finish guarantees a service call.
What follows is the exact sequence: how to contain the mess in the first ten minutes, the one cleaning agent that actually dissolves the gel, and the manufacturer specs that explain why your machine might not survive a cold snap after the incident. We’ll also cover what happens if you washed a cloth diaper by mistake, that’s a completely different, simpler fix.
Key Takeaways
- Stop the washer the second you hear the tell-tale thump-thump of a swollen diaper. Letting it spin spreads gel into the pump.
- The gel is sodium polyacrylate. It dissolves in white vinegar, not soap. Use a 50/50 vinegar-water spray for cleanup.
- After cleaning, run a tub clean cycle at the hottest temperature with two cups of vinegar to clear the drain lines.
- Check your washer’s manual for freeze warnings. LG and Whirlpool state machines exposed to temperatures below 32°F (0°C) risk internal water freezing and leak damage.
- A one-time diaper accident won’t ruin a robust machine, but repeated gel exposure can foul moisture sensors and trigger error codes.
Why a Washed Diaper Is a Different Kind of Mess
You didn’t just wash a sock. You breached a miniature water reservoir. Inside a disposable diaper’s core is a powder of sodium polyacrylate beads, a super-absorbent polymer. In the dry state, it’s a fine sand. Once agitated in water, each bead swells into a clear, jelly-like blob that can hold 300 times its weight.
The problem is mechanical. Your washer’s drain pump is designed to move water, not a slurry of sticky hydrogels. The gel clogs the pump’s impeller, coats the drum’s moisture sensors, and adheres to the rubber door seal. If it reaches the drain hose, it can harden into a plug.
The EDANA diaper testing protocol, the industry standard for evaluating diaper performance, requires testing a minimum of five samples and reporting the average absorbency. That standardized absorbency is what you’re fighting against in your drum.
This is why speed matters. Your goal is to remove the bulk gel before the pump tries to drain the tub.
The 5-Step Cleanup for a Washed Disposable Diaper
Follow this order. Skipping to the drain filter first can flood your laundry room.
1. Kill the Power and Assess.
Unplug the washer from the wall. This eliminates any risk of shock and stops any delayed drain commands. Open the door. If the cycle was mid-wash, you’ll see a drum full of water, laundry, and translucent gel clumps. If it reached the spin, the gel will be smeared across the glass and rubber gasket.
2. Remove the Laundry and Bulk Gel.
Wear rubber gloves. The gel is non-toxic but slippery and unpleasant. Pull out the sopping wet clothes, shaking them off over the drum to discard any loose gel. Use a plastic dustpan or a stiff piece of cardboard to scoop out the larger gel blobs. Place everything in a large trash bag. Do not rinse gel down a sink drain.
3. Wipe Down Every Surface.
Mix equal parts white vinegar and warm water in a spray bottle. Vinevinegar breaks down the polymer’s bonds. Spray the drum, the door glass, and the entire rubber door gasket. Wipe with a damp microfiber cloth. Rinse the cloth frequently. You’ll need to repeat this 3-4 times to get the slippery film off.
4. Run a Hot Vinegar Wash Cycle.
This is non-negotiable. You must flush the microscopic gel particles that escaped your wipe-down. Pour two full cups of white vinegar directly into the drum. Select the hottest water setting available (Sanitize or Heavy Duty) and the longest cycle. If your machine has a dedicated “Tub Clean” cycle, use that. Run this cycle empty.
5. Inspect the Drain Pump Filter.
The filter is your final checkpoint. Consult your manual for its location, it’s often behind a small kickplate at the front bottom of the machine. Place towels beneath it. Slowly unscrew the filter cap. If any gel or debris comes out, clear it. Have a shallow pan ready for residual water. This step prevents a future clog that could mimic a pump failure.
Where this goes sideways: Rushing to the drain filter first. If the drum is full of water, opening that filter releases a flood onto your floor. Always remove the water and gel from the drum first.
| Mistake | Likely Consequence | Timeline |
|---|---|---|
| Letting the cycle finish | Gel grounds into pump & sensors | Immediate clog or error code |
| Using soap to clean gel | Soap binds with gel, creates more residue | Next load smells foul |
| Skipping the hot vinegar flush | Remaining gel dries, hardens in drain lines | Clog appears 2-3 washes later |
| Not checking the pump filter | Trapped gel obstructs water flow | Machine fails to drain on a future load |
What If You Washed a Cloth Diaper by Accident?
This is a best-case scenario. A cloth diaper or insert going through the wash is just extra laundry. There’s no gel to contain. The only concern is if it was a heavily soiled diaper that wasn’t pre-rinsed.
If that’s the case, you might find some solid residue in the drum. Simply remove the diaper, wipe out the drum with a damp cloth, and run a quick rinse cycle to ensure waste is flushed. Your main focus should be on establishing a proper washing cloth diapers routine to prevent this in the future. For soiled ones, a specific method for diapers with poop is essential.
The real damage from cloth diapers is long-term buildup, not an acute incident. Mineral deposits from hard water or detergent accumulation can reduce absorbency. That’s when you’d need a stripping process for diapers.
Could This Accident Ruin Your Washing Machine?
For a single event, probably not. Modern washers are built to handle oddities. The real risk is cumulative damage or pre-existing weakness.
The gel itself is the immediate villain. It can: – Jam the drain pump impeller, stopping drainage. – Coat moisture sensors, causing the machine to misread water levels and overfill or underfill. – Adhere to the heater element (in hot water models), where it can bake on and smell.
However, the manufacturer manuals reveal a secondary, less obvious risk. Both LG and Whirlpool explicitly warn against installing or storing a washer where it will be exposed to freezing temperatures. The LG WT7700H*A manual states exposure below 32°F (0°C) can cause “serious leak damage.”
Why does that matter after a diaper wash? If your cleanup left residual moisture in internal hoses or the pump housing, and you then store the machine in a cold garage or porch, that water can freeze and expand. Ice cracks plastic fittings and splits rubber seals. The diaper incident didn’t break the machine, but the leftover water might if it freezes.
This makes a thorough flush and dry cycle critical, especially before seasonal storage. It’s not just about the gel; it’s about preventing the potential damage to the machine from compounded issues.
How to Prevent It From Happening Again
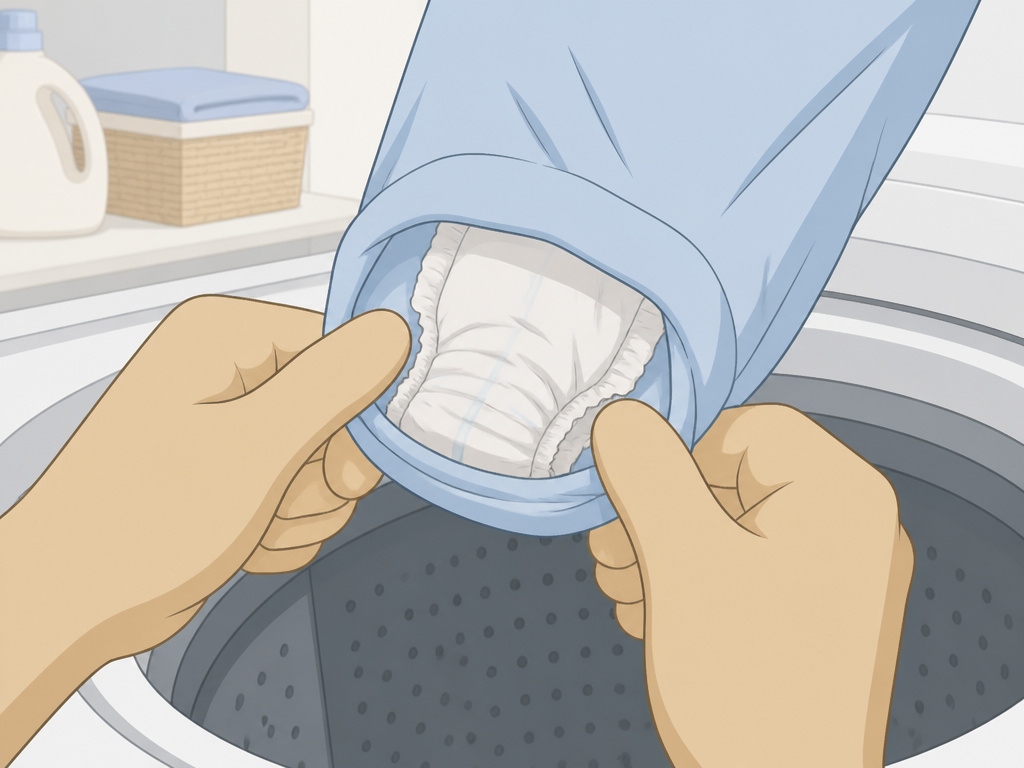 The solution is a system, not just vigilance. Tired parents miss things. Build these checks into your laundry routine.
1. The Pre-Wash Pocket Check.
Make it a habit: before loading the washer, pinch the top and bottom of every pants pocket, onesie leg, and pajama sleeve. A crumpled diaper feels distinctly different from a tissue.
2. Use a Dedicated Hamper with a Lid.
An open basket is an invitation. Use a hamper with a secure, flip-down lid. Better yet, use a dedicated diaper pail for disposables, like a simple Ubbi or a Diaper Genie, kept away from the general laundry sort zone. This physically separates the hazard.
3. Implement a “Shake and Snap” Rule for Kids’ Clothes.
When undressing your child, give each item a firm shake over the toilet or pail before tossing it toward the hamper. Snap the onesie open. This dislodges any hidden wipes or diapers.
4. Clean and Maintain Your Diaper Pail Regularly.
A full, smelly pail encourages rushed disposal. A clean one is part of the system. Regular deep cleaning a diaper pail and knowing how to deodorize diaper pail odors keeps the process manageable. If you use an Ubbi, follow specific steps for how to clean an Ubbi. For a Diaper Genie, understand the common Diaper Genie fixes so it never overflows.
| Prevention Layer | Action | What It Stops |
|---|---|---|
| At the Changing Table | “Shake and Snap” rule | Diapers left bundled inside sleepers |
| At the Hamper | Use a lidded hamper | Stray diapers falling in from the top |
| At the Washer | Pre-wash pocket pinch | The final, costly line of defense |
| System-Wide | Dedicated, well-maintained diaper pail | The root cause: diapers in the laundry zone |
Frequently Asked Questions
Can the gel from the washer damage my septic system?
The absorbent polymer gel is not biodegradable. In large quantities, it could contribute to buildup in a septic tank. The amount from one diaper is negligible, but you should still avoid rinsing scooped gel down any drain. Dispose of it in the trash.
My washer still has a faint odor after cleaning. What now?
The smell is likely residual gel or bacteria trapped in the rubber door gasket or detergent dispenser. Run another hot wash cycle with a cup of baking soda added to the drum. Then, leave the door and detergent dispenser open for 24 hours to air dry completely. Persistent smells may indicate gel in the drain pump, time to check that filter.
I ran a full cycle with a diaper. The machine seems fine. Am I in the clear?
Maybe not. The gel could be lodged in the drain hose or pump, waiting to cause a slow drain or a full clog during your next large load. It’s worth running two consecutive hot water tub-clean cycles as a precaution. Listen for unusual gurgling or straining during the drain phase.
Is the gel dangerous to my skin or my baby’s skin?
No. Sodium polyacrylate is non-toxic and inert. It’s the same material used in “water beads” for sensory play. The irritation risk is near zero, which is why it’s safe in diapers. Wear gloves during cleanup for ease, not safety.
How do I get the gel off of clothing?
Rinse the affected garments under cold running water in a utility sink or bathtub. Gently rub the fabric to dislodge the gel beads. Do not use hot water, as it can set the gel. Once the bulk is gone, wash the clothes normally. For stubborn bits, a second wash may be needed.
The Bottom Line
A diaper in the washer is a messy, frustrating interrupt. But it’s a fixable problem if you act fast with the right steps: stop, scoop, vinegar-wipe, hot-flush, and filter-check. The goal is to protect the machine’s internals from the gel’s sticky, expansive nature.
Long-term, your best defense is a closed-lid hamper and a dedicated, well-maintained diaper pail system that keeps disposables out of the laundry workflow entirely. Because the real cost isn’t the ten-minute cleanup. It’s the $200 service call for a clogged pump you could have prevented.
