
How to Strip a Cloth Diaper: A Complete Step-by-Step Guide
This post contains affiliate links. As an Amazon Associate, we learn from qualifying purchases
To strip a cloth diaper, you soak only the absorbent parts in hot water (not above 130°F) with a stripping agent like RLR or a DIY mix for 4-6 hours, then rinse until the water runs clear. This process removes mineral and detergent buildup causing odors and leaks. Do not strip waterproof covers or pocket shells, and never soak longer than 8 hours, it delaminates PUL.
Stripping isn’t a routine wash. It’s a last-reset for problems your regular washing cloth diapers routine can’t fix. The catch is that the most common online method, a long, hot soak, is also the one that shortens diaper life fastest. Brands like Esembly explicitly warn against it.
What follows is the conflict: the step-by-step that works, the manufacturer limits that keep your diapers intact, and the one survey-backed reason 5% of people see leaks afterward.
Key Takeaways
- Strip only when you have repelling leaks (liquid beads up) or persistent ammonia or barnyard smells, not as monthly maintenance.
- Never use water hotter than 130°F (54°C) and never soak longer than 8 hours. High heat and extended soaking damage elastics and delaminate the waterproof PUL layer.
- You only strip the absorbent parts, prefolds, inserts, flats, All-in-Ones. Skip pocket shells and waterproof diaper covers.
- After stripping, you must rinse until the water is completely clear and suds-free. Any leftover solution will irritate skin.
- If smells or leaks return quickly, the problem is your wash routine, not the diapers. Stripping treats the symptom; more detergent or a water softener fixes the cause.
When to Strip (And When to Walk Away)
Stripping is a corrective surgery for your diaper stash, not a vitamin. It slightly degrades fabrics each time. You use it for three specific failures, all tied to buildup that blocks absorbency.
The part nobody mentions: A Fluff Love University survey found 5% of people experienced leaks after stripping. The cause is still being studied, but over-soaking or overly concentrated solutions stress fabrics and are the suspected culprit.
Strip for this:
- Repelling Leaks: The diaper feels dry, but pee rolls off or leaks immediately. This is a classic sign of detergent or fabric softener coating the fibers.
- Persistent Ammonia Smell: The sharp, eye-watering smell hits as soon as the diaper is wet, not after it’s been sitting. This is often worst in microfiber inserts, where ammonia-producing bacteria bind to mineral deposits.
- Barnyard Stink: A musty, sour smell lingers after a full wash cycle, indicating bacterial buildup trapped in the fibers.
Do not strip for this:
- New diapers. They need prepping (multiple washes to boost absorbency), not stripping.
- General maintenance. If your diapers are clean out of the wash, leave them alone.
- Isolated stains. Sunning or a peroxide spot treatment works better.
- Buying used diapers. Sanitize with bleach first. Only strip if you notice repelling or smells after they’re in use.
If you’re facing persistent diaper rash and suspect your diapers, sanitizing is more urgent than stripping. Bacteria, not just minerals, might be the issue.
What You Actually Need to Strip
You are not stripping the entire diaper system. Waterproof layers and stay-dry liners don’t hold mineral buildup. Strip only the parts designed to absorb.
| Strip This | Do NOT Strip This | Why |
|---|---|---|
| Cotton prefolds & flats | PUL/TPU diaper covers | Covers are water-resistant, not absorbent. Soaking damages the laminate. |
| Hemp, bamboo, cotton inserts | Pocket diaper shells | Shells are just a waterproof pocket; buildup is in the insert inside. |
| Microfiber inserts | All-in-Two snap-in covers | The cover is waterproof; only the snap-in absorbent pod needs stripping. |
| All-in-One (AIO) diapers | Wet bags | Wet bags are storage; stripping their PUL is unnecessary and harmful. |
The rule is simple: if it doesn’t soak up pee, don’t soak it in stripping solution. This saves your diaper covers and pocket shells from premature wear.
The Stripping Agent Showdown: RLR vs. DIY vs. Pods
Your stripping agent chelates minerals, it grabs onto the calcium and magnesium in hard water buildup and pulls them out of the fabric. You have three main options, but only two are worth your time.
RLR Laundry Treatment ($2–$3 per packet)
RLR is the consistent performer. It’s a powder blend of surfactants and chelating agents designed for this job. – Use: 1 packet per standard load. Dissolve completely in hot water before adding diapers. – Best for: Anyone with hard water or unknown buildup. It’s reliable. – Limit: Stick to 4–6 hour soaks. The manufacturer does not recommend overnight use.
DIY Mix: Washing Soda, Borax & Calgon (~$0.50 per strip)
This is the affordable, broad-spectrum option. Washing soda and borax soften water and lift grease; Calgon is a dedicated water softener.
Where this goes sideways: Skipping the Calgon if you have hard water. The washing soda and borax can’t grab all the minerals, so some buildup stays put. You’ll be stripping again in a month. – Ratio: 3 tablespoons of each for ~30 diapers. – Best for: Hands-on strippers who know their water is hard.
GroVia Mighty Bubbles & Similar Pods
These are marketed as deep cleaners, not true strippers. They are a oxygen-based powder in a dissolvable packet. – Reality: They are weaker than a dedicated strip. Many parents, like the blogger at Carmen’s Corner, find they don’t touch serious ammonia buildup. Use them for a mid-routine refresh every 6–8 weeks, not for a corrective reset.
What about bleach? Bleach is a sanitizer, not a stripper. It kills bacteria but doesn’t remove mineral or detergent gunk. Use a 30-minute cold bleach soak after stripping if you dealt with ammonia or bought used diapers.
The 5-Step Stripping Process (And the One Step Nobody Skips)
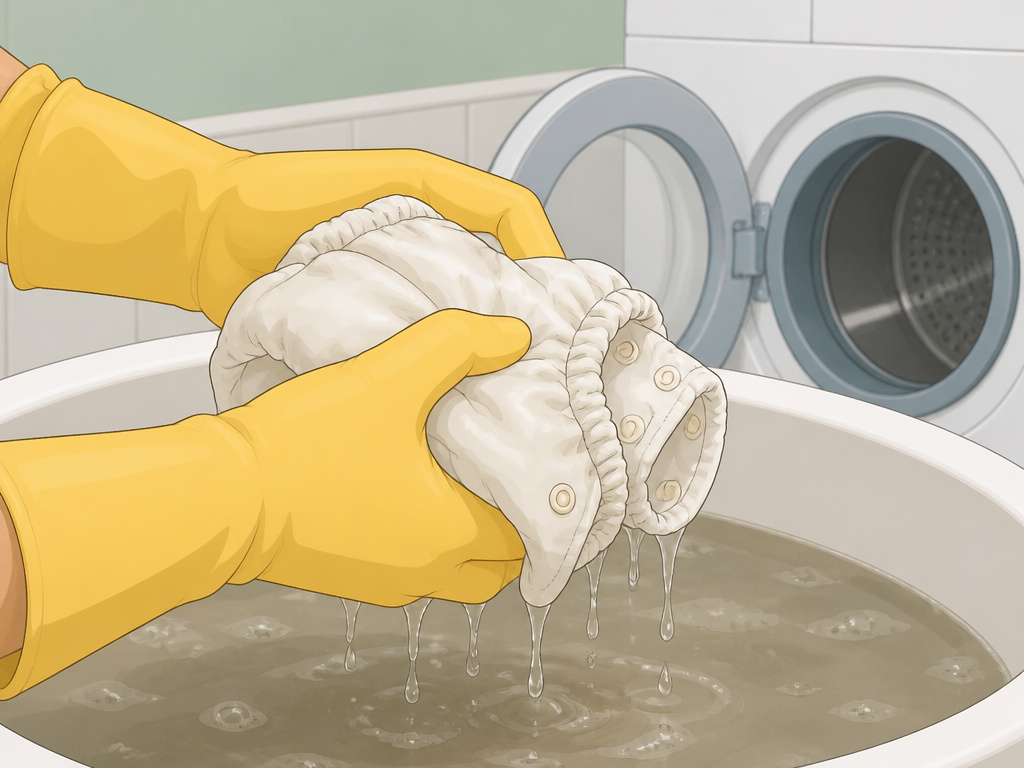
This is the core method, bounded by the non-negotiable limits from manufacturer warnings.
Before you start: Unplug and lock away any small children. You’ll have a tub or washer full of very hot water. The process takes all day. Have towels ready for the inevitable splash.
Step 1: Start with CLEAN Diapers
Run a full, normal wash cycle on your diapers first. Use your regular detergent. Stripping dirty or even just rinsed diapers will cook waste and stains deeper into the fibers. If you’re dealing with washing soiled diapers, that pre-wash is non-negotiable.
Step 2: Dissolve Your Stripping Agent
Fill your bathtub, a large storage bin, or a top-loading washer with hot water, not exceeding 130°F (54°C). A candy thermometer is your friend here. Add your RLR packet or DIY mix powder. Stir vigorously with a long spoon (a clean broom handle works) until you see no granules on the bottom. The solution should look cloudy.
Step 3: Soak for 4–6 Hours
Submerge your clean, absorbent diaper parts. Push them down to ensure no pockets of air. Agitate every hour or so.
Specific warning with timeline: Never extend this soak past 8 hours. At the 8-hour mark, the prolonged, caustic bath begins to compromise the waterproof laminate (PUL) on All-in-Ones and the elastics on fitted diapers. Damage is cumulative and often invisible until the diaper leaks.
Step 4: The Critical Rinse-Out
This is the step people skip, and it’s why babies get rashes post-strip. 1. Drain the nasty, often brown or grey water. 2. Do not wring. Gently squeeze diapers and transfer them to your washing machine. 3. Run a water-only wash cycle (no detergent) on the hottest setting your fabrics allow. 4. Repeat. Run rinse cycles until you open the lid mid-cycle and see zero suds and clear water. This can take 3-5 cycles.
Step 5: Dry Thoroughly
Finish with a final hot wash cycle with your regular detergent to restore freshness. Then dry completely. Sun-drying is excellent for stain removal and sanitation. If using a dryer, opt for low heat to protect elastics.
Why Does My Washer Smell After Stripping?
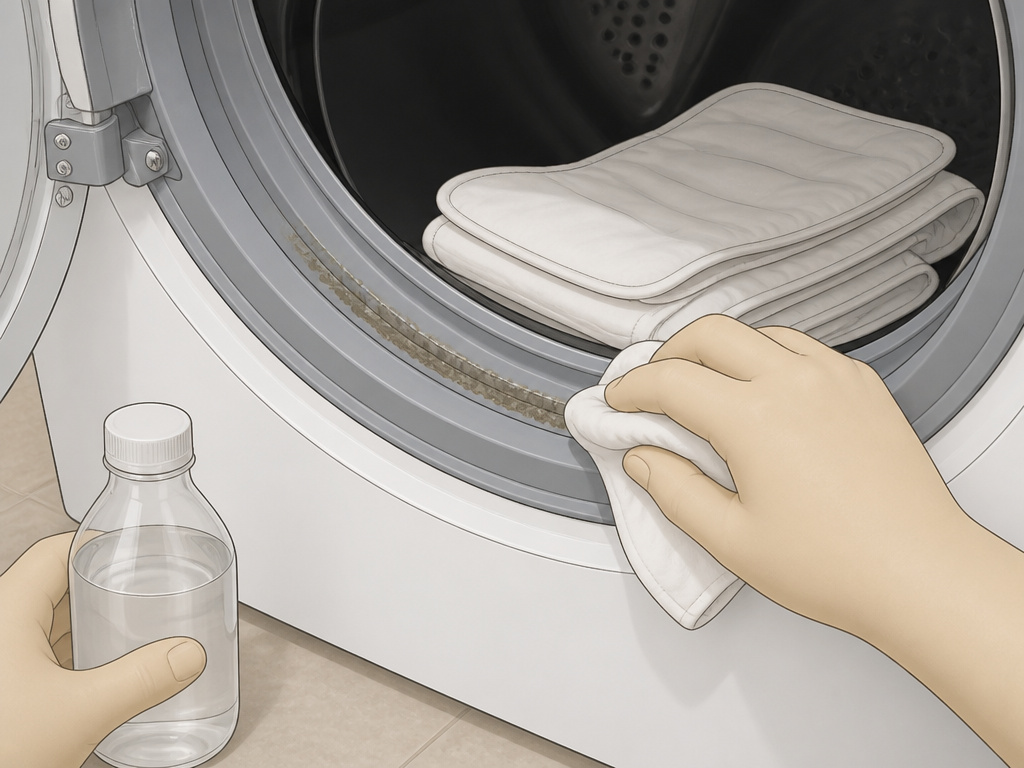
You might notice a foul odor in your washer after all those rinse cycles. That’s not the diapers, it’s the gunk you just washed out of them, now coating your machine’s drum and seals.
Common mistake: Assuming the smell is still in the diapers and stripping them again. You’re just re-contaminating them.
The fix is to clean your washer. Run an empty hot wash with a washing machine cleaner or two cups of white vinegar. Wipe down the rubber door seal and detergent dispenser. This is also good practice after handling diaper gel from disposables.
How to Never Strip Again: Fix the Root Cause
Stripping more than once or twice a year means you’re treating a symptom, not the disease. The recurrence points to a flaw in your core proper washing routine.
| Symptom After Stripping | Likely Root Cause | The Fix |
|---|---|---|
| Ammonia smell returns in <1 week | 1. Not enough detergent 2. Hard water |
1. Increase detergent dose for a “heavily soiled” load. 2. Add a water softener like Calgon or Borax to every wash. |
| Repelling returns quickly | Detergent with fabric softeners | Switch to a clean-rinsing, cloth-diaper-safe detergent like Molly’s Suds or Tide Original Powder. |
| General dinginess & odor | Infrequent washing | Wash every 2-3 days. Stretching beyond 5 days lets ammonia and mold spores multiply. |
Maintain your entire system. A clean stash starts with a clean diaper pail. Regularly deodorizing diaper pails prevents smells from taking hold before wash day.
Frequently Asked Questions
Can stripping cloth diapers ruin them?
Yes, if done incorrectly. Soaking in water hotter than 130°F (54°C) can shrink cotton and melt elastic. Soaking longer than 8 hours, especially in a strong solution, can delaminate the waterproof PUL layer, ruining covers and All-in-Ones. Follow time and temperature limits strictly.
How often should you strip cloth diapers?
Ideally, never. With a good wash routine, you should not need to strip. If you must strip, it should be a rare corrective measure, maybe once after buying used diapers or if a major wash routine error caused buildup. If you’re considering stripping every few months, your wash routine needs adjustment.
Do you strip diaper covers and pocket shells?
No. Strip only the absorbent parts: inserts, prefolds, flats, and the absorbent cores of All-in-Ones. The waterproof diaper covers and pocket shells themselves do not hold mineral or detergent buildup. Soaking them unnecessarily risks damaging their waterproofing.
Is it better to strip diapers in the bathtub or washing machine?
The bathtub is often better for a top-down view and agitation. You can use a top-loading washing machine if you pause it to soak, but most modern HE front-loaders cannot hold water for a long soak. Never use the dishwasher, the extreme heat and detergent are guaranteed to destroy diapers.
What if I don’t have all three DIY ingredients (washing soda, borax, Calgon)?
You can use a combination of two. The Fluff Love University guideline is 1/4 cup each of any two of the three. Using only one ingredient? Use 1/2 cup of it. However, the three-ingredient mix targets the broadest spectrum of minerals and is most effective for hard water.
Before You Go
Stripping is a powerful reset button, but it’s not a substitute for a solid foundation. The goal is a wash routine so reliable that the word “strip” disappears from your vocabulary. Focus on enough detergent, the right water temperature for your wash cycles, and consistent washing frequency.
If you’re feeling overwhelmed by laundry, remember that professional diaper services exist to handle the washing for you. Otherwise, keep it simple: wash often, use plenty of the right soap, and save the nuclear option for when you see the dry leaks or smell the ammonia that won’t quit.
