
How Do You Use a Swim Diaper? Master the Key Steps & Rules
This post contains affiliate links. As an Amazon Associate, we learn from qualifying purchases
To use a swim diaper, you follow a specific routine focused on containment, not absorption. Put it on just before entering the water, ensure a snug fit at the waist and legs, and check it every 30 to 60 minutes, changing it immediately after a bowel movement away from the poolside. A swim diaper’s only job is to contain solid stool; it does not hold urine or prevent diarrhea germs from leaking into the pool, which is why timing and fit are non-negotiable.
That 30-minute check is the essential buffer between a minor incident and a public health shutdown. Swim diapers create a physical seal, but research shows that seal fails rapidly for microscopic threats.
What follows is the operational manual most pool brochures skip: the seven-step dressing routine, the two critical fit checks, the health department rules for fecal accidents, and the one product type that consistently outperforms the rest on containment.
Key Takeaways
- Check and change a swim diaper every 30 to 60 minutes, without exception. This is the CDC’s direct guideline to minimize contamination risk.
- A swim diaper must fit snugly at the waist and thighs; you should only be able to fit two fingers under the waistband. Gaps mean failure.
- Never use a regular diaper under or instead of a swim diaper. It will absorb pool water, swell dangerously, and compromise containment.
- If a child has had diarrhea, keep them out of the water for at least two weeks after symptoms stop, per state health department rules.
- For frequent use, a reusable swim diaper like the Splash About Happy Nappy is more reliable and cost-effective than disposables.
What a Swim Diaper Actually Does (And What It Doesn’t)
A swim diaper is a specialized container. Its design is a direct response to a specific parasite: Cryptosporidium. This germ causes cryptosporidiosis, a severe diarrheal illness that can survive in chlorinated water for days. The diaper’s tight elastic seals are a physical barrier meant to keep solid matter, and the germs within it, out of the shared water.
The Utah Department of Health states: “Any child under three years old, any child not toilet trained, and anyone who lacks control of defecation shall wear a water-resistant swim diaper and waterproof swimwear that has waist and leg openings fitted such that they are in contact with the waist and leg around the entire circumference.”
This is the core job. Everything else is a common misunderstanding.
It does NOT absorb urine. Water and pee flow freely through the material. If a diaper absorbed water, it would swell into a heavy, waterlogged mass that could impede a child’s movement and create gaps at the legs. The chlorine in the pool handles urine neutralization. The diaper handles solids.
It does NOT contain diarrhea. This is the most critical distinction. Health guidelines are unanimous: a child with diarrhea must not swim. The CDC’s public health swim diaper guidance explicitly notes that swim diapers only delay the leakage of diarrhea-causing germs for “a few minutes.” They are not a barrier.
It does NOT replace vigilance. The diaper is a tool, not a force field. Its effectiveness hinges entirely on your adherence to a schedule and a fit protocol.
The 7-Step Swim Diaper Routine (From Dressing to Disposal)
This sequence turns the theory into a leak-preventing habit. Skipping a step usually shows up as a problem within one or two pool sessions.
Step 1: Dress at the last possible moment.
Put the clean swim diaper on in the changing room, right before you walk to the pool. Putting it on at home increases the chance of an accident in the car or lobby, where the diaper’s non-absorbent design will lead to a mess. A soiled diaper also loses its snug fit.
Step 2: Execute the two-point fit check.
First, check the waist. The elastic should be snug against the skin. You should be able to slide two fingers under the waistband, but no more. Second, check the legs. Run a finger around the inner thigh seal. There should be no visible gaps. If you see space, the diaper is too large.
Step 3: Add the required outer layer.
Many public pools and nearly all swim schools require a second containment layer. This is usually a snug-fitting neoprene swim short or cover worn over the diaper. This policy is detailed in many municipal swim diaper regulations. It provides backup compression and helps keep the inner diaper’s seals in place during active play.
Step 4: Set a timer for 30 minutes.
From the moment your child enters the water, the clock starts. The CDC recommends checks every 30 to 60 minutes. For toddlers, lean toward 30. This isn’t just for soiled diapers; it’s also a scheduled bathroom break for kids in potty training.
Step 5: Change away from the poolside.
If the diaper is soiled, or when your timer goes off for a check, leave the water. Change the diaper in a bathroom or designated changing station. Never change at the pool’s edge. This prevents stray particles from contaminating the deck, which can be washed back into the water.
Step 6: Wash hands thoroughly.
After a change, wash your hands and your child’s bottom with soap and water. This step breaks the germ transmission cycle that spreads illnesses like Crypto.
Step 7: Dispose or rinse immediately.
For a disposable, roll it up, secure it with the tabs, and place it in a sealed trash bag. For a reusable, rinse it under cold water in a utility sink to remove chlorine and any residue before placing it in a wet bag for washing at home.
| Step | Action | Why It Matters | Risk If Skipped |
|---|---|---|---|
| 1. Dress Late | Put diaper on just before entering water. | Prevents pre-pool accidents in non-absorbent diaper. | Leak in lobby/car; soiled diaper loses fit before swimming even starts. |
| 2. Fit Check | Snug waist (2-finger rule), no leg gaps. | Elastic seals are the only containment mechanism. | Solid waste bypasses gaps; contamination occurs within minutes. |
| 3. Outer Layer | Add neoprene cover if required. | Provides secondary seal and compression. | Violates pool policy; may be denied entry; reduces containment reliability. |
| 4. Set Timer | Check every 30-60 min. | Adheres to CDC guideline; catches issues before failure. | Diaper overflows; rapid germ release into pool water. |
| 5. Change Off-Deck | Use bathroom/changing station. | Prevents deck contamination from soiled diaper. | Fecal particles on deck wash back into pool, spreading illness. |
| 6. Wash Hands | Soap and water after change. | Breaks fecal-oral transmission route for germs. | Direct spread of bacteria/parasites to your child, yourself, and surfaces. |
| 7. Immediate Cleanup | Bag disposables; rinse reusables. | Contains mess; preserves reusable diaper elasticity. | Odor, staining, and degraded elastic for next use. |
Disposable vs. Reusable: Which One Actually Contains Better?
This isn’t a minor choice. The diaper’s construction directly impacts how well it performs its one job.
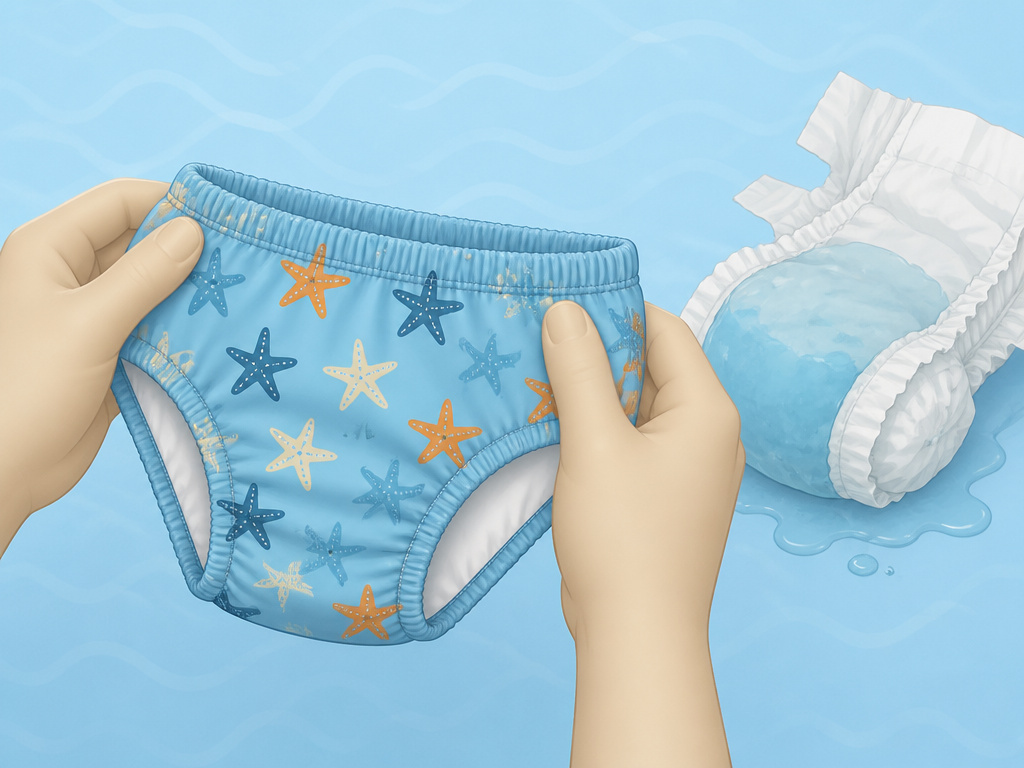
Disposable swim diapers (like Huggies Little Swimmers) look like a regular diaper but lack absorbent pulp. They have a water-resistant outer shell and an inner mesh liner. They are convenient for travel or one-off outings. * Pros: No pre-washing, compact for packing, easy disposal. * Cons: Fit can be less adjustable, leg cuffs can be weaker, per-use cost adds up, environmental waste.
Reusable swim diapers (like the Splash About Happy Nappy or iPlay reusable designs) are made of waterproof fabric (like PUL/TPU) with adjustable snaps or hook-and-loop closures and tight elastic at the legs and waist. * Pros: Superior, customizable fit, more durable elastic seals, cost-effective over 10+ uses, less waste. * Cons: Requires washing and air-drying, upfront cost is higher, need to pack a wet bag.
Where this goes sideways: Choosing a disposable two sizes too big “for growth.” The leg gaps will be immediate, and the diaper will fail its first containment test. Always size for a snug fit today.
For containment, the reusables almost always win. The adjustable waist and stronger, sewn-in leg elastic create a more reliable seal. The best reusable swim diapers are engineered for this specific purpose, while disposables are often designed with a focus on disposability. For a family that swims weekly, a reusable system is the clear default.
The Non-Negotiable Health Rules (From Diarrhea to Accidents)
Health departments write pool rules in response to documented outbreaks.
The Diarrhea Rule: This is an absolute ban. The Utah Department of Health states: “Do not take your child swimming if they have diarrhea. A diaper (no matter how good) will not stop diarrhea from getting into the water. Wait 2 weeks after diarrhea has stopped to go swimming.” This is because Cryptosporidium is shed in diarrhea and is extremely chlorine-resistant.
The Fecal Accident Procedure: If solid stool escapes the diaper into the pool, the operator must clear the pool immediately. The Anne Arundel County guidelines note that “solid stool and diarrhea incidents require different procedures and closure times.” A solid stool incident may require a temporary closure and elevated chlorine levels. A diarrhea incident mandates a longer closure, often 12-24 hours, for hyperchlorination.
The “No Regular Diaper” Rule: This is a safety and hygiene imperative. A regular diaper under a swim diaper absorbs pool water, becoming a heavy, sagging weight that can pull the swim diaper out of position and create dangerous drag for an infant.
How to Choose and Size a Swim Diaper
Sizing is the most common point of failure. Weight ranges on packaging are a starting point, not a guarantee.
For Disposables: Match the weight range to your child’s current weight. If they are at the top of a range, size up. The tabs should fasten without stretching the front panel taut. The leg cuffs should sit directly against the skin without biting in.
For Reusables: Use the brand’s specific size chart, which usually includes weight, waist, and thigh measurements. The Splash About Happy Nappy, for example, has a detailed “Check Size Before You Buy” calculator. A proper fit is snug but doesn’t leave deep red marks.
Common mistake: Putting a swimsuit over the diaper that is too tight. It can compress the diaper’s elastic and create channels for leaks. The outer layer should be snug, not constricting.
What about those DIY swim diaper hacks that involve cutting slits in a regular diaper? Don’t. You compromise the diaper’s structural integrity, and the absorbent material inside will still swell with water, defeating the purpose. It’s a messy, unreliable shortcut.
The Post-Swim Protocol: Cleaning and Storage
What you do after swimming determines the diaper’s lifespan and hygiene for next time.
For Reusables:
- Rinse under cold running water immediately to remove chlorine, salt, or sand.
- Wash in a gentle cycle with a mild detergent. Avoid fabric softener, it coats the waterproof fabric and reduces its effectiveness.
- Air dry completely. Never put a reusable swim diaper in the dryer; the heat degrades the waterproof laminate and elastic.
- Store it dry and unfolded. Check the elastic periodically for slackness.
For Disposables: Dispose of them in a sealed bag. Never try to wash and reuse a disposable swim diaper. The structure will break down and it will not contain anything.
This maintenance is why having a dedicated diaper pails for cloth diapers system helps, even for swim diapers. A wet bag for transport and a pail with a lid at home contain odors and mess until laundry day.
Frequently Asked Questions
How often should you change a swim diaper?
Change it immediately after a bowel movement. Otherwise, check it every 30 to 60 minutes during a swim session, as recommended by the CDC. Because a swim diaper does not absorb urine, wetness alone is not a reason to change, only soiling is.
Can my child wear a swim diaper under a regular swimsuit?
Yes, in many public pools, a regular swimsuit over a well-fitted swim diaper is acceptable. However, many swim schools and some facilities require a dedicated neoprene outer cover for a double-layer system. Always call ahead to confirm the facility’s policy.
What’s the difference between swim diapers for infants and toddlers?
Infant swim diapers are sized for smaller waist and thigh measurements and often have a cut-out or softer design for the umbilical cord area. Toddler sizes are larger and sometimes designed to look more like swim shorts (e.g., “jammer” styles). The containment principle is identical.
Can I use a swim diaper for regular diaper changes?
No. You should never use a swim diaper as a regular diaper. These single-purpose aquatic tools are non-absorbent, so urine leaks directly onto clothes, car seats, or bedding.
When can my child stop using a swim diaper?
When they are fully toilet-trained and can reliably communicate their need to use the bathroom, even in the exciting distraction of a pool. For most children, this is between ages 3 and 4. Don’t transition based on age alone; wait for consistent accident-free dry days.
Before You Go
Using a swim diaper correctly boils down to three things: a clock, a tape measure, and a health bulletin. Set your timer for 30-minute checks. Measure the fit by the two-finger rule and the absence of leg gaps. And respect the hard health rules about diarrhea and accidents, they exist because the alternative is a closed pool and a sick child.
The default pick for most families is a reusable swim diaper. It fits better, contains more reliably, and pays for itself within a season. Disposables have their place for the single beach day. But the routine is the same either way: dress at the water’s edge, check on schedule, change off the deck, and wash your hands every time. That’s how you use a swim diaper. It’s not complicated, but it is specific.
