
The Correct Way to Clean Your Skip Hop Baby Changing Pad
This post contains affiliate links. As an Amazon Associate, we learn from qualifying purchases
Clean your Skip Hop changing pad with a daily wipe using a damp cloth and mild detergent, followed by a weekly deep clean with a white vinegar solution for stains and odors. The manufacturer’s 2-year warranty covers material defects, but not the “bright orange” biological stains users report within months.
That warranty clause is where most cleaning guides stop. They tell you to wipe it down. They don’t tell you what to do when a simple wipe leaves a permanent pink shadow after a blowout, which is the single most common complaint in long-term owner reviews. The pad is marketed as wipe-clean, but the reality is that biological pigments from baby poop can bind to the surface foam in a way water and soap can’t reverse.
What follows is a three-tier system: what to do every day, what to do once a week to prevent stains, and the specific steps to tackle a stain that’s already set in. We’ll also cover what absolutely voids your warranty and how this pad’s care compares to other popular wipeable changing pads.
Key Takeaways
- The official cleaning method is a damp cloth with mild soap, but this often fails on set-in biological stains reported by users.
- A weekly clean with a 1:1 white vinegar and water spray prevents odor buildup and biofilm that lead to permanent staining.
- For existing “bright orange” or pink stains, a paste of baking soda and water left for 15 minutes can lift the pigment without damaging the foam.
- Using bleach, abrasive scrubbers, or soaking the pad voids the 2-year limited warranty against material defects.
- Always use the safety belt and discontinue use when your baby can push up on hands and knees, regardless of how clean the pad is.
The Daily Wipe-Down vs. The Deep Clean
Your Skip Hop pad needs two different cleaning rhythms. Confusing them is how stains set.
The daily wipe is for surface mess. Keep a spray bottle with water and a drop of dish soap or baby detergent near your changing table. After each diaper change, mist the pad and wipe with a soft cloth or paper towel. The goal is to remove the obvious residue before it dries.
The part nobody mentions: Let the pad air-dry completely before the next use. Trapping moisture against the non-skid base is the fastest way to grow mildew you can’t see, and that sour smell comes from the bottom up.
The weekly clean is non-negotiable. This is where you prevent the stains that show up in reviews. Mix equal parts white vinegar and water in a spray bottle. Once a week, take the pad off your dresser or table, spray the entire surface, and let it sit for five minutes. The vinegar breaks down urine crystals and fats that soap leaves behind. Wipe it clean with a damp cloth.
Why vinegar works: It’s a mild acid that dissolves mineral deposits and kills odor-causing bacteria without leaving a toxic residue. Soap is a base; it can’t break down the uric acid that eventually yellows the foam.
| Cleaning Tier | Frequency | Solution | Goal | Time Required |
|---|---|---|---|---|
| Daily Wipe | After each use | Water + drop of mild detergent | Remove fresh mess, prevent drying | 30 seconds |
| Weekly Clean | Once per week | 1:1 White vinegar & water spray | Degrease, deodorize, prevent stain setting | 5-10 minutes |
| Stain Attack | As needed (for set stains) | Baking soda paste (see below) | Lift biological pigment from foam | 20-30 minutes |
How to Remove Set-In Stains (The “Bright Orange” Problem)
If you’re reading this because a stain already exists, you’re not alone. User reports specifically mention a “bright orange stain” appearing after a few months. This is likely porphyrin, a pigment in baby waste that binds strongly.
Here is the step-by-step stain removal process. You’ll need baking soda, water, a soft cloth, and white vinegar.
- Blot and Scrape. First, remove any solid residue with the edge of a wipe or a plastic scraper. Blot liquids—don’t rub, or you’ll push the pigment deeper into the foam’s microscopic pores.
- Make a Baking Soda Paste. Mix two tablespoons of baking soda with just enough water to form a thick, spreadable paste. The consistency should be like toothpaste.
- Apply and Wait. Spread the paste over the stained area, extending slightly past the stain’s edges. Let it sit for 15 minutes. The baking soda will work as a gentle abrasive and a lifting agent.
- Scrub Gently. Using a soft-bristled brush (an old, clean toothbrush works) or a cloth, gently scrub the paste in a circular motion. Don’t use force—you’re not scrubbing the stain, you’re scrubbing the paste that’s absorbed it.
- Rinse and Neutralize. Wipe the paste away with a cloth dampened with clean water. Then, go over the area once with a cloth dampened with your 1:1 vinegar solution. This neutralizes any baking soda residue and ensures the surface is clean.
- Air-Dry Thoroughly. Let the pad dry completely before putting it back on your changing table pad. A fan can speed this up.
Where this goes sideways: Using hydrogen peroxide or bleach on these stains. They can react with the pigment and set it permanently, or worse, degrade the waterproof top layer and foam underneath. Once that layer is compromised, the pad will absorb smells and become unsanitary.
This method is also your go-to for deep cleaning a changing pad of any brand with a similar sealed foam construction, like a Keekaroo changing pad.
What NOT to Use on a Skip Hop Pad
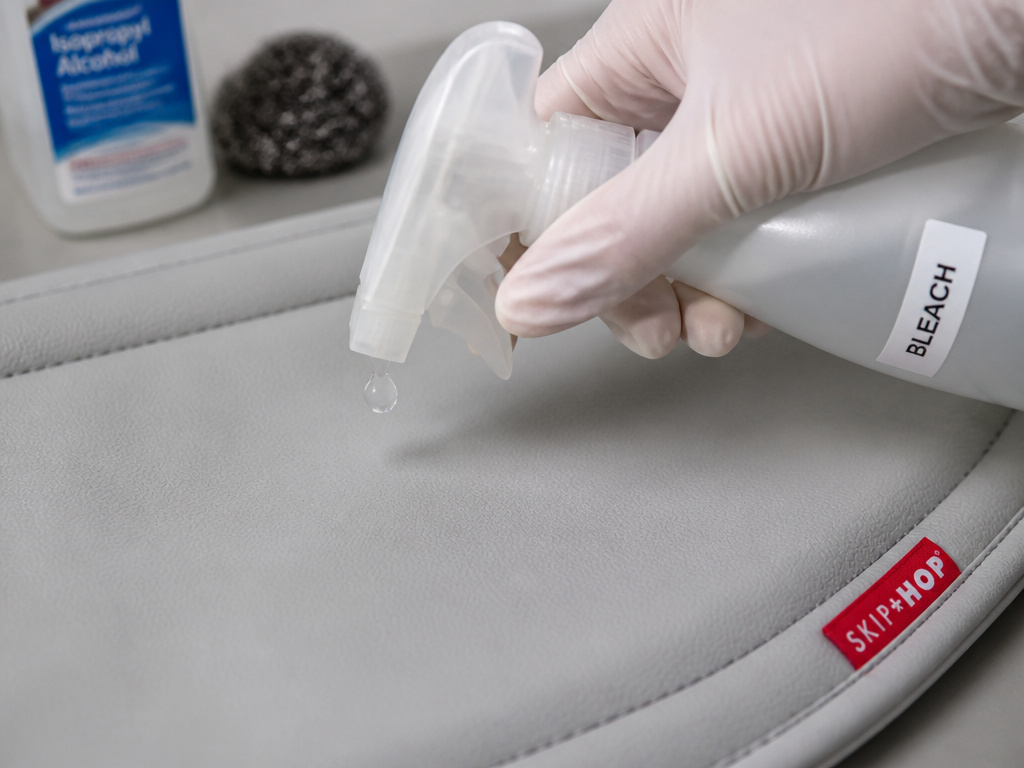 The pad’s warranty and material integrity hinge on you avoiding a short list of products. This isn’t scare talk. It’s the difference between a pad that lasts two years and one that cracks in six months.
Banned Cleaners:
- Bleach or Chlorine Cleaners: These oxidize and break down the plasticizers in the vinyl-like top layer, making it brittle. The surface will eventually crack and peel.
- Abrasive Cleansers or Pads: Scrubbing powders (like Comet) or steel wool will scratch the wipe-clean surface. Those micro-scratches become hiding places for bacteria and make future stains harder to remove.
- Essential Oils or Undiluted Vinegar: Neat essential oils can degrade the material over time. Straight vinegar is too acidic for weekly use and can dry out the foam.
- Alcohol-Based Sanitizers or Wipes: Isopropyl alcohol dries out the surface layer, leading to premature cracking. It also doesn’t clean organic matter—it just spreads it around.
Banned Methods:
- Soaking or Submerging: The pad is not submersible. Water will get trapped in the foam core, leading to internal mildew and a permanent musty smell. The non-skid base is especially prone to holding moisture.
- Machine Washing: This will destroy the pad’s structure and void the warranty immediately.
- High Heat: Don’t place it in direct sunlight for prolonged periods or use a hair dryer on it. Heat can warp the foam and weaken the adhesive holding the layers together.
Warranty, Safety, and When to Replace
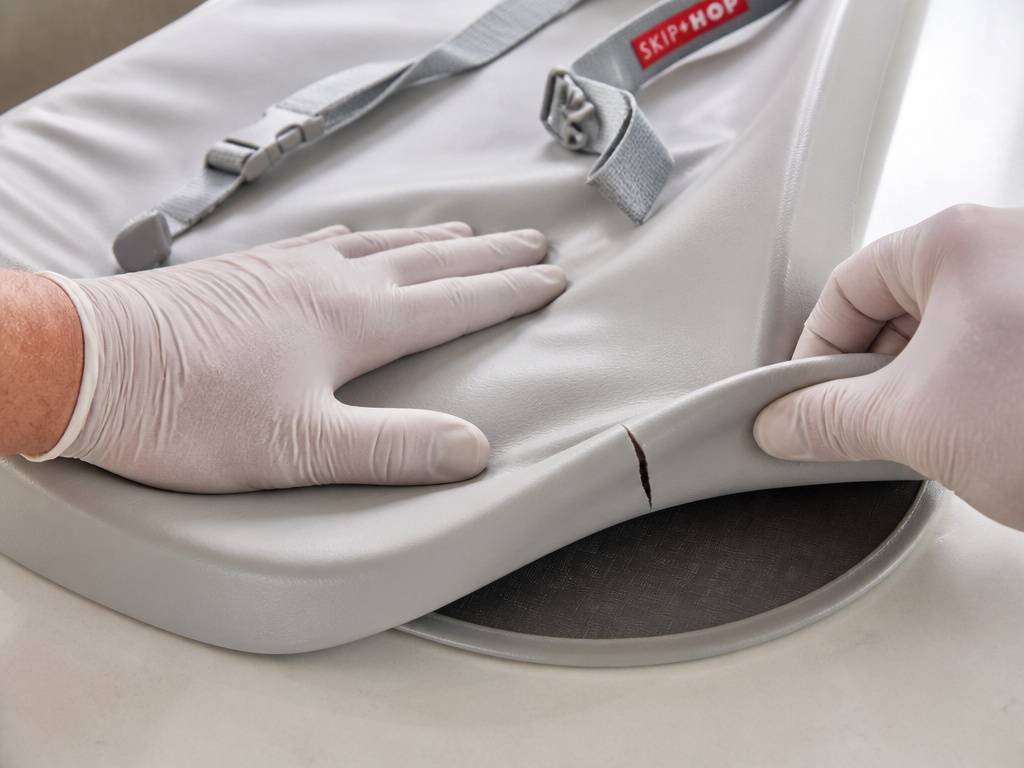 Cleaning maintains the pad, but it doesn’t make it immortal. The Skip Hop 304050.06 model has a 2-year limited warranty against defects in materials and workmanship. Stains from use are explicitly not a defect.
Before you start any deep clean: Check the pad’s structural integrity. Look for cracks in the surface, peeling edges, or a foam core that feels lumpy or collapsed. Cleaning a compromised pad is a waste of time and a safety risk.
The official manual states the pad supports up to 30 lbs and requires a minimum surface of 33in x 20in. Never use it on a smaller, unstable surface. Always secure the safety belt, even for a quick change.
Discontinue use immediately if:
- Your baby can push up on hands and knees.
- Your baby can roll over independently while on the pad.
- You see any cracking, tearing, or permanent deformation of the foam.
- The non-skid base has lost its grip.
A clean pad isn’t a safe pad if it’s being used past its developmental or physical limits. At that point, it’s time to research new diaper changing pads.
Skip Hop vs. Other Pads: A Cleaning Reality Check
How does the Skip Hop stack up against other popular options? The answer changes your cleaning strategy.
The Skip Hop’s contoured foam design is more complex than a flat, rigid pad like the Keekaroo. The seams and curves can trap residue, demanding more diligent weekly wipes. Its foam core also means it can’t be cleaned with the same liberal soaking some solid plastic pads tolerate.
If you find the maintenance too much, a protective changing pad cover can be a barrier, but it defeats the purpose of a wipe-clean pad. Alternatively, a flat, seamless pad like the Hatch or a high-quality changing table pad from a different brand might be easier to sanitize with a simple spray-and-wipe.
Bottom line: The Skip Hop pad is a good middle-ground option, but its “wipe-clean” claim has limits that daily vinegar maintenance and prompt stain treatment can push much further.
Frequently Asked Questions
Can you use Clorox wipes on a Skip Hop changing pad?
No, you should not use Clorox or any bleach-based wipes. The chlorine can degrade the pad’s waterproof surface over time, leading to cracks. It also doesn’t effectively clean organic mess. Stick to a damp cloth with mild soap for daily cleaning and a vinegar solution for weekly sanitizing.
Why does my Skip Hop changing pad smell like vinegar after cleaning?
That means you didn’t rinse it thoroughly. After using a vinegar solution, always wipe the pad down a second time with a cloth dampened with plain water. This removes any residual vinegar smell. The odor should dissipate completely once the pad is dry.
How do you clean the non-skid bottom of the changing pad?
Lift the pad and wipe the non-skid base with a dry cloth weekly to remove dust. If it gets soiled, use a barely-damp cloth with a drop of soap, then wipe with a dry cloth immediately. Never let moisture sit against the base, as it can compromise the adhesive and promote mildew.
Can the Skip Hop changing pad go in the washing machine?
Absolutely not. Machine washing will destroy the foam interior and void the warranty. The pad is spot-clean only. Submerging or soaking it will trap water inside, leading to mold and permanent damage.
Before You Go
Cleaning a Skip Hop changing pad is a three-part habit: a quick daily wipe, a proactive weekly vinegar spray, and a targeted baking soda attack on stains. The warranty covers breaks, not stains, so your routine is your real guarantee. Always secure the safety belt, and retire the pad the moment your baby shows signs of mobility. For those dealing with persistent rash issues, using a compatible clean diaper rash cream that doesn’t leave a waxy residue will also make your cleaning job easier. Keep it simple, keep it consistent, and you’ll extend the life of your pad well beyond the first messy months.
