
How to Pack a Diaper Bag: Organize with the 4-Zone Method
This post contains affiliate links. As an Amazon Associate, we learn from qualifying purchases
To pack a diaper bag, use the 4-zone system: keep diapering, feeding, emergency, and parent items in separate, dedicated compartments. Pack one diaper per hour you’ll be out plus one extra, and include a sealed “blowout kit” for major accidents. Fresh breastmilk lasts 8–10 hours at room temperature; feeding supplies must never share space with dirty diapers or wipes.
That system turns a chaotic bag into a predictable kit. Most packing lists tell you what to bring. They don’t tell you where to put it so you can find a pacifier in a dark car or grab a clean onesie without unpacking the entire bag on a public bathroom floor.
What follows is not another checklist. It’s a method. You’ll get the exact diaper math, the non-negotiable separation rule from pediatric sources, and the one pre-packed emergency unit that stops a blowout from ending your trip.
Key Takeaways
- Pack one diaper per hour plus one extra. For a two-hour errand, that’s three diapers.
- Build a sealed blowout kit with a full outfit, wipes, and a wet bag. Keep it untouched until disaster strikes.
- Never store feeding items with diapering supplies. The CDC and AAP advise this separation to limit germ spread.
- Clean the bag’s interior weekly with mild soap and water. Diaper bags collect bacteria faster than you realize.
- Choose a bag with wipeable liners and multiple compartments. A backpack style is best for hands-free use.
The 4-Zone Packing System
Forget stuffing everything into one big cavity. A functional diaper bag works like a tool kit, with each category of item living in its own designated zone. This is the difference between digging and grabbing.
A well-organized diaper bag aligns with guidance from the CDC and American Academy of Pediatrics on limiting germ spread during outings. Separating clean feeding supplies from soiled diapering materials is a foundational hygiene practice.
The four zones are: Diapering, Feeding, Emergency, and Parent. Assign each zone a specific pocket, pouch, or section of your bag. Clear organizer pouches are the best tool for this job, letting you see contents at a glance. A bag like the GoBabyMart Diaper Backpack is built for this, with multiple compartments and wipeable liners.
Zone 1: Diapering. This is your everyday change station. It holds diapers, wipes, cream, and a changing pad. Keep this zone near the main zipper for one-handed access. Zone 2: Feeding. Bottles, formula, breast milk, and snacks go here. This zone is sacred, it must never share space with Zone 1. Use an insulated pocket or a separate cooler bag with ice packs. Zone 3: Emergency. This is your blowout kit. It’s a sealed unit containing a full spare outfit, extra wipes, and a wet/dry bag. Do not raid it for everyday changes. Zone 4: Parent. Your wallet, keys, phone, hand sanitizer, and a snack for you. A front pocket is ideal.
This system makes restocking trivial and lets any caregiver, a partner, grandparent, or babysitter, find what they need without a tour guide. It’s the single most effective step in organizing your diaper bag for stress-free outings.
How Many Diapers to Pack (The Real Math)
The old “one per hour” rule is a starting point, but it’s incomplete. The full formula is: one diaper for every hour you’ll be out, plus one extra diaper.
For a two-hour errand, pack three diapers. For a four-hour outing, pack five. That “+1” is your buffer for delays, surprise multiple changes, or the dreaded “poop/pause/poop” sequence one mom documented where her baby needed four diapers in a single changing attempt.
| Trip Length | Diaper Count (Hour +1) | When to Add More |
|---|---|---|
| 1–2 hours | 3 diapers | Newborns, or if baby already has a rash. |
| 3–4 hours | 5 diapers | Long car rides, flights, or known messy feeders. |
| 5+ hours / Day trip | 6–8 diapers | Always include a sealed blowout kit (see below). |
Store diapers vertically in their zone so you can count them at a glance. If you’re packing a diaper bag for two, apply this math separately for each child and then add two extra diapers to the total. Under-packing is a gamble; over-packing turns your bag into dead weight. This formula finds the middle.
The Non-Negotiable Blowout Kit
A blowout isn’t an “if.” It’s a “when.” Most parents react by frantically digging through every compartment, soiling clean clothes in the process. The solution is a pre-packed, sealed emergency kit you only open for catastrophic leaks.
Where this goes sideways: Using your emergency outfit for a simple spill. If you raid the blowout kit for a minor wet sleeve, you won’t have it when a true disaster hits 20 minutes later. That’s how trips end early.
Your blowout kit should contain: 1. A full spare outfit (onesie, pants, socks). 2. A small pack of wipes. 3. A reusable wet/dry bag for soiled clothes. 4. A large disposable bag (biodegradable) for the dirty diaper.
Assemble these items in a gallon-sized ziplock or a dedicated small pouch. Seal it. Place it in your bag’s Emergency Zone and do not touch it for routine changes. Its only job is to contain a mess and get you back on the road. Restock it the moment you use it. This kit is especially critical when packing for travel, where you’re far from home and laundry.
Feeding Supplies: Separation and Safety
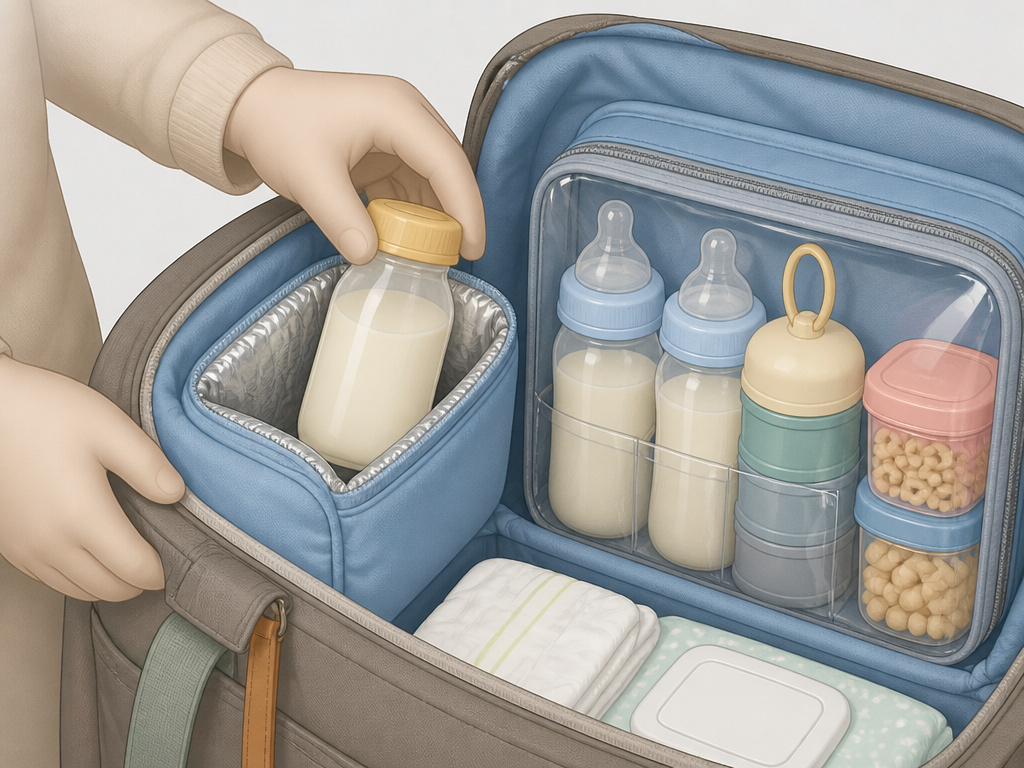 This is where most bags fail the hygiene test. The AAP explicitly recommends separating feeding tools from diapering supplies to limit germ spread. Milk and formula are food; they don’t belong in the same compartment as dirty diapers.
Breastmilk Storage: Fresh breastmilk lasts 8–10 hours at room temperature. If your trip is shorter, you can skip the cooler. For longer outings or if you prefer it cold, use an insulated pocket. The Elkin diaper bag has a built-in one for ice packs. Otherwise, a separate cooler bag is mandatory.
Formula: Carry pre-measured powder in a dispenser and a bottle of water. Mix at feeding time. Never prepare bottles in advance to sit in the bag.
Snacks: Use spill-proof containers like the Snack-A-Pillar. For toddlers, pack at least two different snack options, if you bring only one, they will reject it or drop it.
Feeding items go in Zone 2. Use organizer pouches to keep bottles upright and snacks contained. This separation isn’t just tidy; it’s a direct application of CDC hand-hygiene guidance for outings.
Bag Choice and Hygiene Maintenance
 Your bag is a tool. Its design dictates how well you can execute the 4-zone system. Prioritize these features:
* Backpack style: Frees your hands. Essential if you’re also carrying a baby or a toddler.
* Wipeable interior: Look for polyester or nylon linings. You will spill.
* Multiple compartments: At least three separate pockets to support your zones.
* Insulated pocket: For bottles and perishables.
Your bag is a tool. Its design dictates how well you can execute the 4-zone system. Prioritize these features:
* Backpack style: Frees your hands. Essential if you’re also carrying a baby or a toddler.
* Wipeable interior: Look for polyester or nylon linings. You will spill.
* Multiple compartments: At least three separate pockets to support your zones.
* Insulated pocket: For bottles and perishables.
Popular bags that fit this bill include the Itzy Ritzy Boss Backpack (17 pockets) and the Ju-Ju-Be Be Sporty. For a full comparison, see our guide to the best diaper bags. For shorter trips, a small diaper bag with good compartmentalization can work.
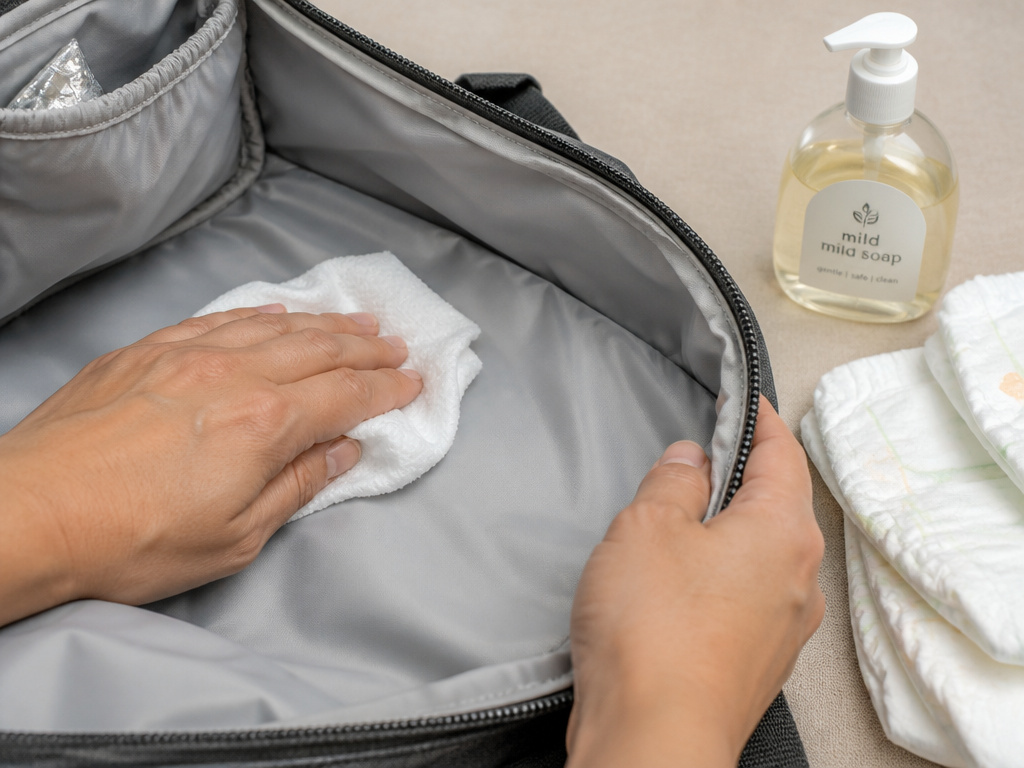
Common mistake: Never cleaning the bag. Wipes and diapers leave behind residues that bacteria thrive on. The bag’s interior becomes a contamination risk for food and clean clothes.
Weekly Cleaning: Empty the bag completely. Wipe the interior with mild soap and water. Let it air dry fully before repacking.
After Every Outing: Remove any trash, dirty clothes, or used wipes immediately. Restock depleted items from each zone right away, don’t assume they’re still there next time.
Adapting Your Pack for Age and Weather
The core system stays the same. The contents within each zone shift.
Newborns (0–3 months): Double the outfit changes. Pack two extra onesies in your Emergency Zone. Add burp cloths to Zone 2. You’ll need more diapers, lean toward the higher end of the hourly count. The checklist for a hospital diaper bag is a great newborn starting point.
Older Babies & Toddlers (6+ months): Replace burp cloths with sippy cups and finger foods. Add a small toy or book to Zone 3. Snack variety becomes critical.
Weather changes everything. Your spare outfit must match the conditions. * Hot & Humid (90°F+): A spare onesie is enough. Include a sun hat and baby sunscreen in Zone 3. * Cold (Under 65°F): Pack a full spare set: long sleeves, pants, socks, and a hat. A lightweight blanket in Zone 3 is wise. * Rainy: A spare outfit is useless if it’s cotton and gets soaked. Pack a weather-resistant jacket or a second wet/dry bag to shield the clean clothes.
Frequently Asked Questions
How do I pack a diaper bag for a day trip?
Use the 4-zone system, but scale up. Pack 6–8 diapers (hour +1 math). Include two full spare outfits in your blowout kit. Double the snacks and milk/formula. A bag with more capacity, like a travel diaper bag, is worth the investment for day-long adventures.
What is the most forgotten diaper bag item?
Hand sanitizer. You need it before and after changes, especially in places without a sink. Clip a travel-size bottle to the outside of your bag’s Parent Zone. The second most forgotten item is a plastic or reusable bag for dirty clothes, don’t just toss them in loose.
Can I use a regular backpack as a diaper bag?
You can, but you’ll fight it. A dedicated diaper bag has wipeable liners, insulated pockets, and compartment layouts designed for baby supplies. Using a regular backpack usually requires buying several organizing pouches to create the zones manually.
How often should I clean my diaper bag?
Wipe the interior weekly with mild soap and water. Spot-clean spills and messes immediately after an outing. If you’ve stored milk or food, clean that compartment every time. A bag that smells fine can still harbor bacteria.
What’s the best type of diaper bag for twins?
You need space and organization. Look for a bag designed for high volume, like the Ju-Ju-Be B.F.F. Or a large backpack style. Pack using the 4-zone system, but double the contents in each zone. Our review of the best diaper bags for two kids breaks down the top options for siblings.
Before You Go
Packing a diaper bag is a skill, not a guessing game. The goal isn’t to carry everything you own. It’s to carry the right things in the right places. Start with the 4-zone system. Commit to the diaper math and the sealed blowout kit. Never let feeding supplies mingle with diapers.
Your bag should feel predictable. When a cry comes from the backseat, you should know exactly which pocket holds the pacifier, which pouch has the wipes, and where the clean clothes are sealed away waiting for the big mess. That confidence is what turns an outing from a stressful test into a normal part of your day. Now go pack.
