
How to Make a 3 Tier Diaper Cake: A Stunning Gift Tutorial
This post contains affiliate links. As an Amazon Associate, we learn from qualifying purchases
To make a 3 tier diaper cake, you need 60-100 size 1 diapers, rubber bands, ribbon, and a central support. Build the bottom tier first with 35-45 diapers, the middle with 20-36, and the top with 6-15. Secure each tier with a large rubber band, stack them around a core like a paper towel roll, lock with dowels, then decorate with ribbon and baby items to hide the bands.
The 96-diaper count in the answer isn’t random. It’s the number that produces a dense, professional-looking cake that won’t sag in the middle of a baby shower. Most tutorials give a vague range, which leaves you with a wobbly top tier or a half-empty bottom layer.
What follows is the method that uses household items you already own. You’ll see two ways to build the core, the one decoration rule that keeps every diaper usable, and how to pick a diaper brand that holds its shape.
Key Takeaways
- Use 60-75 size 1 diapers for a standard cake; 96 for a dense, impressive showpiece.
- The cake pan method (packing diapers into pans) is foolproof for perfect circles.
- Never use glue, pins, or burlap on the diapers, they become trash or a hazard.
- A paper towel roll core and wooden dowels are the secret to a cake that survives car travel.
- Decorate with wide ribbon and tucked-in toys, not permanent adhesives.
The Core Materials You Actually Need
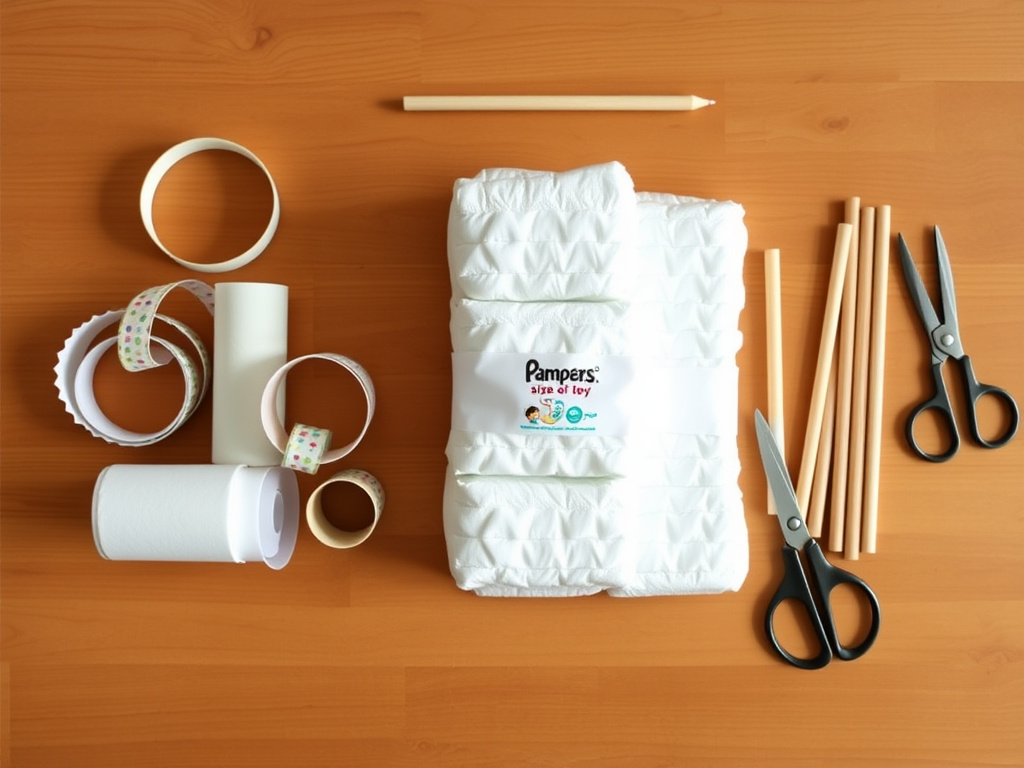
You don’t need specialty craft supplies. A successful cake hinges on a few specific items that control shape and stability.
Gather these first: – Diapers: 60-75 size 1 diapers (e.g., Pampers Swaddlers, Huggies Little Snugglers). Size 1 rolls tightly without being too bulky. Brands with a consistent shape work best. – Rubber Bands: One large, thick band for each tier (3 total), plus many small ones for rolling individual diapers. – Ribbon: 2-3 yards of wide decorative ribbon (1.5 to 2 inches) to cover the large rubber bands. Also have thin ribbon (1/8-inch) or curling ribbon for tying rolls if needed. – Central Support & Stabilizers: * Paper towel roll or a tall, straight baby product bottle (lotion, shampoo). * Three wooden dowels (like those for kabob skewers) or long lollipop sticks. – Base: A sturdy cake board, pizza cardboard round, or a serving platter. – Tools: Scissors.
Common mistake: Using flimsy ribbon. Thin ribbon cuts into the diaper bundle and doesn’t cover the rubber band, so the cake looks messy before you even start decorating.
The diaper count is your first major decision. Seventy diapers makes a nice gift. Ninety-six makes a statement. The difference is in the tier density, more diapers per tier means a taller, fuller cake, but it also requires a sturdier core.
Step 1: Roll and Prepare Your Diapers
Every diaper must be rolled tightly. A loose roll creates gaps, and the tier will collapse when you try to stack it.
Here’s the technique: Lay a diaper flat. Start at the top (the end with the tabs) and roll it tightly toward the folded bottom. Keep the roll as straight as possible. Secure it with a small rubber band in the middle. Don’t use the diaper’s own tabs, they’ll come undone. Roll all your diapers at once. It’s the most time-consuming part, but doing it upfront means smooth assembly later.
If you hate rolling, an alternative diaper cake technique builds tiers with flat diapers. It’s faster but creates a different, more rustic look.
Step 2: Build Your Tiers (Two Proven Methods)
You have two paths here: the controlled Cake Pan Method or the traditional Bottle Core Method. The first is easier for beginners and guarantees symmetry.
The Cake Pan Method
This method uses cake pans as molds. You need a 12-inch pan for the bottom tier and an 8-inch pan for the middle and top.
| Tier | Pan Size | Diaper Count | Key Tip |
|---|---|---|---|
| Bottom | 12-inch | 35-45 | Pack diapers tightly, standing on edge, until the pan is full. |
| Middle | 8-inch | 20-25 | Layer diapers in the same direction for a uniform circle. |
| Top | 8-inch (used with fewer diapers) | 6-15 | Adjust diapers inward after banding to form a smaller circle. |
- Bottom Tier: Place your 12-inch pan on the table. Stand rolled diapers on their ends, packing them tightly side-by-side in a circle within the pan. Fill the entire pan. While they’re still in the pan, slide a large, thick rubber band over the entire bundle to secure it. Lift the tier out. You now have a perfect diaper wheel.
- Middle Tier: Repeat the process in the 8-inch pan with 20-25 diapers.
- Top Tier: Use the same 8-inch pan, but only place 6-15 diapers in a smaller ring inside it. Secure with a rubber band. Once removed, you can gently squeeze the circle smaller to proportion it against the larger tiers.
This method delivers perfect circles every time. The pan walls hold everything in place while you apply the crucial rubber band. It’s the difference between a lopsided craft and a professional-looking centerpiece.
The Bottle Core Method
This method builds the cake around a central bottle, which becomes part of the gift.
- Stand a tall baby lotion or shampoo bottle in the center of your cake board.
- Wrap your first rolled diaper around the bottle, holding it in place.
- Continue adding diapers, each one overlapping the last, to form a tight ring around the bottle. Use heavy objects like bookends to brace the growing ring if you’re working alone.
- Once the bottom tier is the desired size, continue adding diapers upward around the same bottle to form the middle tier. The top tier is a small separate bundle added last.
The bottle method is less precise but includes a useful gift inside. The choice depends on whether your priority is perfect geometry or an extra present.
Step 3: Stack and Secure the Structure
This is where most cakes fail. Stacking three tiers with just rubber bands is a recipe for a leaning tower of diapers. You need internal reinforcement.
- Create a Central Core: Poke a hole through the center of each tier (between diapers). For the cake pan method, slide a paper towel roll through all three layers. For the bottle method, you’re already using the bottle.
- Lock it with Dowels: Insert three wooden dowels vertically through all three tiers, spacing them evenly around the core. Push them down until they hit the base. This triangulates the load and prevents any side-to-side shift.
- Final Adjustments: Ensure each tier is centered. Gently twist or adjust individual diapers to fill any gaps.
Skipping the dowels means the cake might survive a gentle photo. It will not survive a car ride to the shower. The top tier will slide off, and the whole structure will lean.
Step 4: Decorate Without Destroying the Gift
The goal is a beautiful cake where every diaper remains perfectly usable. That means no permanent damage.
- Cover the Bands: Wrap your wide decorative ribbon around each tier to conceal the large rubber bands. Overlap the ends and secure them together with a small dot of hot glue or a straight pin, but only to each other, never to the diapers. The ribbon should be tight enough to stay put but not so tight it distorts the tier.
- Add Accessories: Tuck small baby items into the ribbon layers: pacifiers, small teethers, socks, or travel-size lotions. You can also lay a receiving blanket over a tier like cake frosting.
- Top it Off: Place a stuffed animal, a large rattle, or a bouquet of baby bottles on the very top.
- Avoid These: Hot glue, craft glue, or any adhesive on the diapers. Straight pins poked into the diapers. Burlap or twine, as fibers can shed into the diaper lining.
Your diaper selection matters here too. White or pastel-colored diapers (like Pampers Pure) offer a cleaner canvas than heavily printed designs if you’re using a sheer ribbon.
Where this goes sideways: Gluing decorations directly to diapers. It renders them unusable and can even be a skin irritant for the baby. The new parents will have to pick off dried glue or throw the diaper away, which defeats the purpose of a practical gift.
Design Variations and Pro Tips
Once you master the basic 3-tier shape, you can modify it. The principles of a stable core and clean decoration remain the same.
- Themed Cakes: Instead of a round cake, shape tiers into a pumpkin diaper cake for Halloween or a pram diaper cake for a vintage theme.
- Diaper Sizing Strategy: Some makers use size 1, 2, and 3 diapers for the top, middle, and bottom tiers respectively. This lets the parents use each layer as their baby grows. It’s a thoughtful touch, but mixing sizes can make stacking trickier.
- Transport Tip: If the shower is elsewhere, build the cake on its final display board. Wrap the entire cake loosely in cellophane after decorating to keep everything in place during transit.
Remember the purpose of a diaper cake: it’s a functional gift disguised as decoration. Every choice should honor that.
Frequently Asked Questions
How many diapers do I need for a 3 tier diaper cake?
You need between 60 and 100 diapers, depending on desired fullness. A standard cake uses 70-75 size 1 diapers. A dense, show-stopping cake uses about 96. Split them roughly as follows: 35-45 for the bottom, 20-25 for the middle, and 6-15 for the top tier.
What size diapers are best for a diaper cake?
Size 1 diapers are the ideal choice. They are small enough to roll tightly into a neat cylinder but not so tiny that you need an enormous quantity. They are also the size newborns grow into quickly, making them immediately useful for most parents.
Can you make a diaper cake without rolling the diapers?
Yes. You can build tiers by layering flat, unrolled diapers in a circular pattern around a core. This flat diaper cake method is faster and gives a fuller, softer look, but the tiers can be less defined and slightly harder to stack securely.
How do you keep a diaper cake from falling apart?
Use internal support. A paper towel roll or bottle core provides a vertical spine. Three wooden dowels inserted through all tiers lock them together horizontally. Never rely solely on the tension of rubber bands or ribbon to hold the weight of stacked diapers.
What should you not put on a diaper cake?
Do not use hot glue, craft glue, or straight pins directly on the diapers. Avoid burlap or twine, as loose fibers can get into the diaper lining. These materials compromise the diaper’s safety and usability, turning a practical gift into a crafting liability.
Before You Go
A three-tier diaper cake is part gift, part art project. Its success lies in a tight roll, a measured diaper count, and hidden engineering. Build with a cake pan for control, reinforce with dowels, and decorate with a light touch. The result is a centerpiece that wows the room and delivers a month’s worth of diapers in one unforgettable package. Now you know what a good diaper bag is for carrying all those baby essentials home.
