
Learn How to Make a Diaper Burp Cloth That Resists Fraying
This post contains affiliate links. As an Amazon Associate, we learn from qualifying purchases
To make a diaper burp cloth, you sew two fabric rectangles, a decorative top layer and an absorbent back layer, right sides together, turn them right-side out, and topstitch the edges closed. The proven size is 10 inches wide by 18 inches long, using a 1/2-inch seam allowance. You must wash and dry all fabric first; skipping this step is the number one reason homemade burp cloths pucker, shrink unevenly, and fray within weeks.
That 10×18 dimension is the sweet spot that covers a shoulder without dragging, and it’s short enough that the inner layers don’t shift and bunch after a dozen washes. Get the size wrong, and the cloth loses its shape.
What follows is the one method that works every time, the fabric combinations that actually absorb, and the single prep step that every beginner misses. You’ll also see why a 2005 patent argues that patterned fabric is a functional choice that masks stains and saves the cloth from harsh bleach cycles.
Key Takeaways
- Pre-wash all fabric. Flannel, terry, and minky shrink at different rates. Sewing unwashed fabric guarantees a warped, puckered cloth after its first laundry cycle.
- Commit to 10×18 inches. This size drapes properly, fits in a diaper bag, and is small enough to prevent the inner layers from separating with use.
- Use a 1/2-inch seam allowance. A narrower seam risks popping open under tension; a wider one eats into the usable surface area of the cloth.
- Topstitch 1/8 inch from the edge. This isn’t just decorative. It flattens the seam allowance and mechanically locks the layers together, stopping them from shifting during washing.
- Patterns mask stains. A U.S. Patent from 2005 notes that patterned, color-fast fabric hides milk and spit-up stains visually, reducing the urge to bleach and degrade the cloth’s fibers.
Tools & Materials You’ll Need
Gather these items before you cut anything. Using the right tool for each job is what separates a burp cloth that lasts for one baby from one that lasts for three.
You need a sewing machine. A basic model like the Brother SE400 is more than capable. Hand-sewing won’t create stitches tight enough to withstand repeated washing and wringing-out. You also need sharp fabric scissors or a rotary cutter and mat, straight pins or fabric clips, an iron, and a tape measure.
The fabric choice is where the cloth’s function is decided. You are building a two-layer sandwich. – Top Layer (Decorative): Use cotton flannel. It’s soft against baby’s skin and comes in endless patterns. Quilting cotton works, but it’s less absorbent. – Bottom Layer (Absorbent): Use terry cloth (the looped fabric of a towel) or minky. Terry is more absorbent; minky is plusher and dries faster. Avoid regular fleece, it repels moisture.
You’ll need a half-yard of each fabric to make 4-5 burp cloths. Buy an extra quarter-yard if you’re new to cutting straight lines.
The Core Two-Layer Method (and Why Size Matters)
This is the only method you need for a durable, professional-looking burp cloth. It creates a fully enclosed seam, so there are no raw edges to fray.
The two-layer burp cloth construction method involves sewing two fabric rectangles right sides together, leaving a small turning gap, inverting the cloth, and topstitching the perimeter closed. This creates a clean finish on all sides and encases the seam allowances, preventing fraying through multiple wash cycles.
Cut two 10×18-inch rectangles. One from your decorative fabric, one from your absorbent fabric. Use a rotary cutter and a quilting ruler against a mat for perfect squares. Scissors work, but your edges won’t be as straight. If your fabric pieces aren’t identical, your finished cloth will pull to one side. Lay the cut pieces on top of each other to check. Recut if needed.
Pin the rectangles right sides together. Place the pretty sides of the fabric facing each other, so the “wrong” sides are facing out. Pin around all four edges, leaving a 3-inch gap unpinned in the middle of one long side. This gap is your turning hole.
Sew around the perimeter with a 1/2-inch seam allowance. Start sewing a few inches from one corner of the turning gap. Backstitch at the start. Sew all the way around the rectangle, pivoting at the corners, and stop sewing a few inches before you reach your starting point, creating that 3-inch gap. Backstitch again.
Where this goes sideways: Skipping the backstitch at the start and end of your seam. The turning process puts immense stress on those last few stitches. Without backstitching, they unravel as you pull the fabric through the hole, and you have to start over.
Clip the corners and turn right-side out. Before turning, take your scissors and snip off the excess fabric at each corner. Don’t cut the stitching, just cut the fabric diagonally about 1/8 inch from the stitch line. This reduces bulk and gives you sharp corners when turned. Reach into the turning gap, grab the fabric, and pull the entire cloth right-side out.
Press flat and topstitch. Use your iron to press the cloth flat, pushing the seam allowance out to the edges. Tuck the raw edges of the turning gap inward and press that section flat too. Finally, topstitch 1/8 inch from the edge all the way around the cloth. This closes the turning gap and, critically, locks the two fabric layers together. If you skip topstitching, the layers will separate and bubble in the wash.
Fabric & Size Deep Dive: What the Tutorials Don’t Say
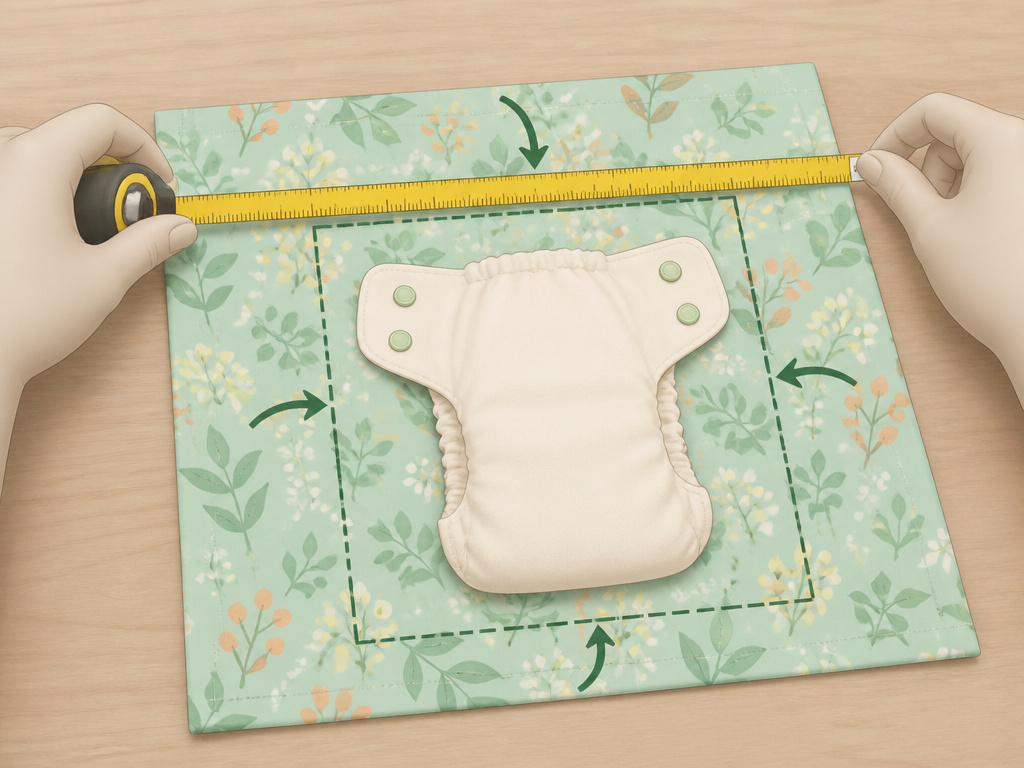 Every tutorial online suggests a slightly different size. You’ll see 10×20, 14×7, even 11×17 from a patent. This isn’t helpful.
| Finished Size | Best For | The Trade-Off |
|---|---|---|
| 10″ x 18″ | Daily use, diaper bag | Balanced drape; layers stay put |
| 10″ x 20″ | Maximum shoulder coverage | Long ends can drag; layers may separate |
| 14″ x 7″ (approx.) | Quick wipes, changing pad | Too small for serious spit-up |
| 11″ x 17″ (Patent Spec) | Optimal absorbent pad area | Less common fabric yield |
The 10×18 size wins because of fabric math. A standard fabric bolt is 42-44 inches wide. Half a yard is 18 inches long. If you cut 10-inch widths, you can get four perfect rectangles from a half-yard with minimal waste. The 20-inch length forces you into awkward cuts and more leftover scraps.
The other variable is the prefold cloth diaper. Many guides use these as a ready-made absorbent core. Here’s the truth they gloss over: not all cloth diapers are created equal.
Common mistake: Assuming a “prefold diaper” is a standard size. The “Thinking Closet” tutorial notes they often have “wonky dimensions,” requiring you to center fabric by eye, not measurement.
If you use a diaper, you’re adapting to its size. Your decorative fabric must be wider than the diaper so you can wrap the edges around it. Width is the critical dimension. The Gerber 3-ply cloth diapers are a common, if inconsistent, choice.
The Non-Negotiable Prep Step: Washing Fabric First
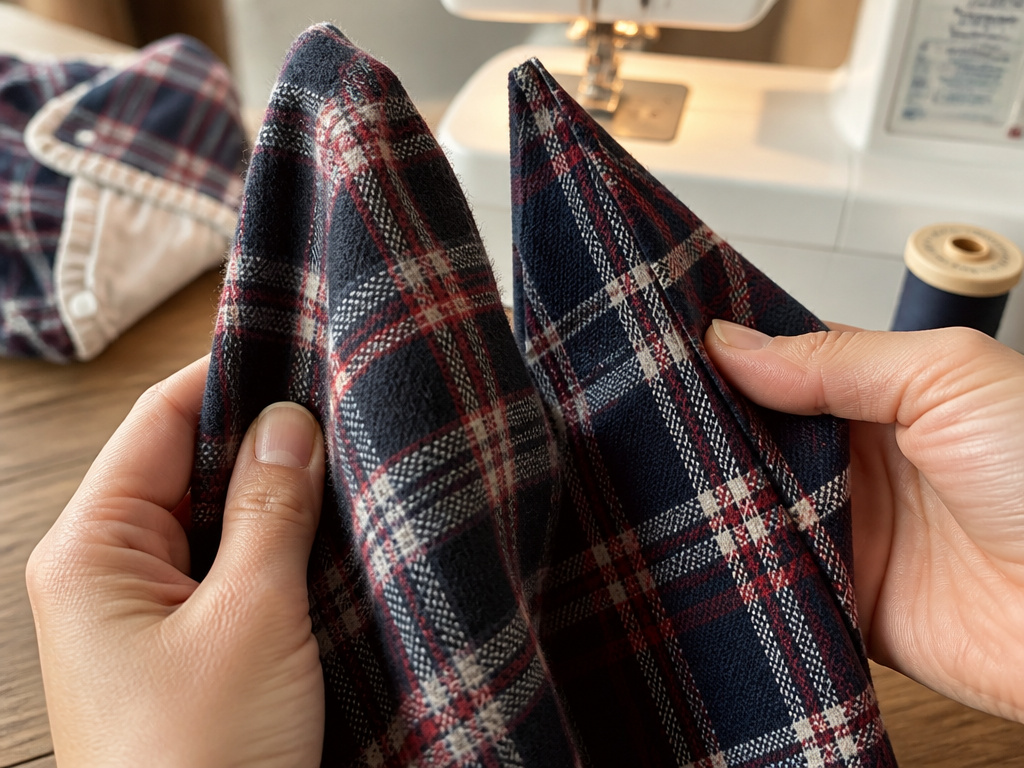 This is the step every beginner wants to skip. Don’t.
Wash and dry all your fabric exactly as you will launder the finished burp cloth. Use hot water and dryer heat if that’s your routine. This preshrinks the material. Flannel, terry, and minky can shrink between 3% and 5% in different directions. If you sew unwashed flannel to pre-shrunk terry, the first wash will cause the flannel to contract more. The result is a permanently puckered, wrinkled cloth that never lies flat again.
The sensory clue is texture. Unwashed flannel feels stiff and slightly fuzzy. Washed flannel is softer and drapes easily. You can feel the difference.
Why Topstitching Isn’t Optional
You might think topstitching is just a decorative touch. It’s not. It’s a mechanical fix for a physical problem.
When two layers of fabric are sewn together and turned, the seam allowance, the extra fabric inside the seam, can flip and move. Every time the cloth is used, wrung out, or washed, those layers experience shear forces. Without topstitching, they slowly separate, creating air pockets and bubbles. The cloth becomes lumpy.
Topstitching compresses the seam allowance flat against the body of the cloth and stitches through all layers, anchoring them in place. Use a slightly longer straight stitch (3.0 on most machines) for this. It’s stronger and more visible.
The Patent Case for Patterns (It’s Not Just About Looks)
A 2005 U.S. Patent (US 2005/0079327 A1) for a baby burp cloth makes a functional argument for patterns. The invention’s goal is to mask stains without destructive bleaching.
“Reusable burp cloths… Are bleached cotton or similar materials which, when exposed to the secretions of a baby, retain unsightly stains… Extreme bleaching techniques or repeated washing cycles tend to destroy the integrity of the materials, leading to lessened absorbency or fraying at the edges.”
The patent’s solution is to use “one or more colors and one or more color fast designs or patterns permanently set in the cloth fibers” to visually camouflage stains. This is a longevity hack. A bold, multi-colored print makes spots from spit-up or milk far less noticeable, which means you’re less likely to soak the cloth in bleach or scrub it harshly.That preserves the fibers and the cloth’s absorbency for years.
When you choose your decorative flannel, think about stain camouflage. Busy patterns, small prints, and darker colors hide wear better than solid white or pastels.
Troubleshooting: Fixes for Common Problems
Your first burp cloth might not be perfect. Here’s how to diagnose the usual issues.
- Puckered or Wavy Seams After Washing: You didn’t pre-wash the fabric. Unfortunately, this is not fixable. The differential shrinkage is permanent. Use the cloth as a rag and start over with pre-washed fabric.
- Layers Bunching Inside: You skipped the topstitching, or your topstitch was too far from the edge (more than 1/4 inch). The layers have separated. You can try to quilt the cloth by stitching a few lines across its middle to re-anchor the layers, but it’s a salvage job.
- Corners Aren’t Sharp When Turned: You didn’t clip the corners enough, or you left too much fabric when clipping. Next time, snip closer to the stitching line, and press the corners firmly with a pointed tool (like a knitting needle) before ironing.
- Fabric Shifting While Sewing: Minky and terry cloth are slippery. Use more pins than you think you need, place one every 2 inches. Or, use fabric clips instead of pins. Sew slowly over pinned sections.
Frequently Asked Questions
Can I use a different size for a burp cloth?
You can, but you’ll change its function. A 14×7 inch cloth is better as a changing pad liner or a quick face wipe. A 10×20 inch cloth will cover more of your back but can be cumbersome in a diaper bag. The 10×18 size is the consensus for a reason, it’s the most versatile.
How many burp cloths do I need to make?
New baby can go through 5-8 burp cloths in a day. Making a set of 8-12 is a practical goal. Since you get about 4 cloths from a half-yard of each fabric, plan on buying 1 to 1.5 yards of each type to make a full set.
What’s the best fabric for the absorbent layer?
Terry cloth is the most absorbent and durable choice. Minky is very soft and absorbent but can be trickier to sew. A cotton birdseye or gauze weave (like in flat cloth diapers) is also highly absorbent but less plush. Avoid regular polyester fleece, it’s warm but not absorbent.
Do I have to use a sewing machine?
Yes, for a durable cloth. Hand-sewn stitches, even if done tightly, generally can’t withstand the repeated stress of washing, drying, and use as well as machine stitches. A simple straight stitch on any machine is sufficient.
How do I stop the minky fabric from shedding or stretching?
Cut minky with a very sharp rotary cutter, not scissors, to minimize shedding. When sewing, place the minky on the bottom, against the feed dogs of your machine. The feed dogs will help control the stretch better than if it’s on top. Use a walking foot if you have one.
Before You Go
Making a diaper burp cloth boils down to three unwavering rules: wash your fabric first, cut to 10×18 inches, and never skip the topstitch. The fabric you choose changes the game, terry for heavy drool, flannel for softness, and a busy print to hide the evidence.
This isn’t a complicated project. The first one might take 30 minutes. Your fifth will take 10. The value isn’t just in saving money; it’s in making something that exactly fits your need, lasts through multiple babies, and becomes a genuinely useful tool in the daily chaos of parenting. Grab a half-yard of fun flannel and some terry, and start with one. You’ll have a set before the baby arrives.
