
Organize Your Diaper Bag: The 4-Zone System to Stop Germs
This post contains affiliate links. As an Amazon Associate, we learn from qualifying purchases
Organize a diaper bag by separating items into four dedicated zones: diapering, feeding, emergency, and parent essentials. This 4-zone system, backed by pediatric guidance, prevents germ spread between supplies like bottles and diapers and lets you find anything in seconds without unpacking the entire bag. A sealed blowout kit is non-negotiable.
Most diaper bag advice tells you to buy pouches and make a list. That misses the point. The real problem is how items interact inside the bag during a frantic change at the park. When wipes, a half-eaten pouch, and a clean onesie share a compartment, you get a mess.Worse, you get cross-contamination.
What follows is a system, not just a checklist. You’ll get the four zones, the one sealed kit you must never skip, and the packing math that changes for a newborn versus a toddler. By the end, your bag will work for you, not against you.
Key Takeaways
- Use the 4-zone system (diapering, feeding, emergency, parent) to physically separate items by purpose. This is critical for hygiene.
- Maintain a sealed blowout kit with a full spare outfit and wet bag. This kit is for disasters only and stays sealed until needed.
- Never store feeding items (bottles, snacks) in the same compartment as diapering supplies. The American Academy of Pediatrics recommends this separation to limit germ spread.
- Pack diapers based on a ratio of one per hour away, plus two extras. A newborn needs more redundancy than a toddler.
- Choose a bag with wipeable linings and multiple compartments. A dedicated structure makes the zone system possible to maintain.
The 4-Zone System Explained
Forget organizing by “stuff you need.” Organize by scenario. The four zones are Diapering, Feeding, Emergency, and Parent. Each zone gets its own pouch or dedicated compartment inside your bag.
This is about containment and speed. When a diaper blows out, you reach for the Emergency zone.When it’s snack time, you go to Feeding without brushing against dirty wipes. This separation aligns with the American Academy of Pediatrics recommendation to keep feeding tools away from diapering supplies to limit germ spread.
Common mistake: Dumping all items into the main compartment. When diapers, food, clean clothes, and dirty items mix, the bag becomes a disorganized, unhygienic pit within two outings.
Here’s what belongs in each zone. A structured bag like the GoBabyMart Diaper Backpack or a BÉIS tote with an insert makes this physically possible.
| Zone | Core Items | Why It’s Separate |
|---|---|---|
| Diapering | Diapers, wipes, cream, portable changing pad. | Everything for a routine change is grouped. This meets CDC guidance for having all supplies ready at once during changes outside the home. |
| Feeding | Bottles, formula, snacks, bib, burp cloth. | Isolates food items from contamination. Critical for hygiene, especially before a baby’s immune system is robust. |
| Emergency (Blowout Kit) | Sealed wet/dry bag, complete spare outfit, extra wipes. | For major accidents only. Sealing it keeps the clean clothes clean and contains the mess instantly. |
| Parent | Wallet, phone, keys, sanitizer, water bottle. | Your essentials stay accessible and don’t get lost under baby items. |
How to Pack Each Zone Like a Pro
A zone is only as good as what’s in it. Under-pack, and you’re unprepared. Over-pack, and you’re carrying a dead weight. This is where most generic checklists fail, they don’t give you the ratios.
The Diapering Zone: Your Ground Control
This zone lives near the bag’s main zipper. You should be able to unzip and have every diapering item at your fingertips.
Pack diapers using the hourly rule. For a two-hour errand, that’s three diapers. For a half-day outing, pack five or six. Add two extra as a buffer. Store them vertically in a slim pouch so you can see the count at a glance. Your changing pad is part of this zone. A dedicated, wipeable pad like the BÉIS Portable Changing Pad is better than the one that comes with your bag. It gives a clean, defined space anywhere.
The CDC’s guidance on healthy diaper changing stresses having all supplies ready before you start. Grouping your diapering zone accomplishes this. It turns a stressful search into a single grab.
The Feeding Zone: The Hygiene Barrier
This zone is a sanitary boundary. Never let a bottle or snack pouch share space with a diaper. Use a separate, ideally insulated, pouch for all feeding items.
For newborns, this means pre-portioned formula, bottles, and a burp cloth. For toddlers, add spill-proof snack cups and a bib. Refillable travel bottles for diaper cream and sanitizer save space here. After feeding, wipe down bottles and bibs before returning them to the zone to prevent bacterial growth inside your bag.
The Blowout Kit: Your Emergency Lifeline
This is the zone most parents skip until the first catastrophic car seat incident. A blowout kit is a sealed, standalone pouch containing a full spare outfit (onesie, pants, socks), a hefty stack of wipes, and a wet/dry bag.
The kit stays sealed. You do not raid it for a routine change of clothes. Its entire purpose is to be a complete, uncontaminated reset button for a level-10 mess. When used, replace the entire kit as soon as you get home.
Where this goes sideways: Using your emergency outfit for a minor spill. Then, when a true blowout happens, you’re left with a soiled baby and no clean clothes. The trip ends immediately.
The Parent Zone: Don’t Forget Yourself
Your wallet, keys, and phone need a home. A small, easy-access pocket or a specific pouch keeps them from sinking to the bottom. This is also where your hand sanitizer and a water bottle live. If you use your diaper bag as your purse, this zone is non-negotiable.
Choosing the Right Bag for Your System
The best organization system fails if your bag fights it. You need a structure that supports the zones.
Backpack styles like a dedicated diaper bag backpack offer the best compartmentalization for the 4-zone system. They keep weight evenly distributed and your hands free. Tote bags can work, but only if you use a diaper bag organizer insert. An insert like the BÉIS Diaper Bag Organizer creates the walls and pockets your system needs inside an otherwise open cavity. Look for wipeable linings. Spills happen. A lining you can wipe clean with a disinfectant cloth prevents smells and bacterial buildup over time.
The LIINI® NAPPY Changing Backpack is a prime example of built-in structure. Its 29-liter capacity is divided into specific sections, a separate compartment for wipes, a built-in USB port, and dedicated space for a bottle warmer. That’s a bag designed for separation.
Newborn vs. Toddler: Adjusting the Ratios
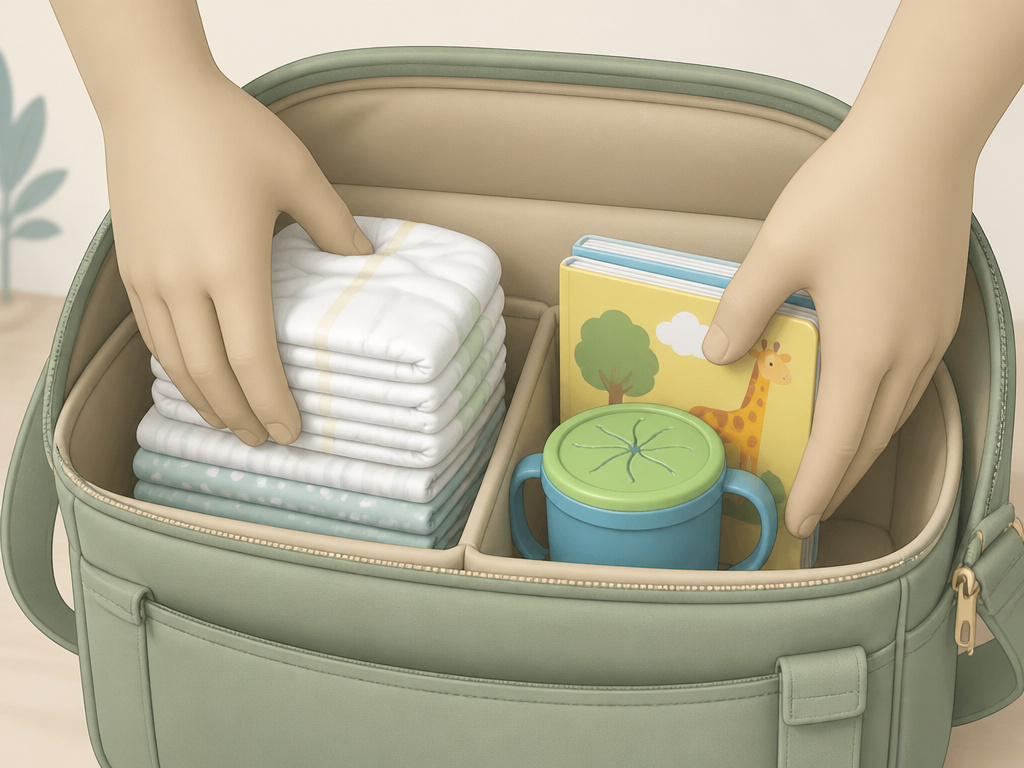 Your baby’s age changes the math. Packing a diaper bag for a newborn is about redundancy. Packing for a toddler is about containment.
Newborns (0-6 months) need more of everything, more often. * Diapers: Pack one for each hour you’re out, plus three extras. * Feeding: For formula-fed babies, bring one bottle for each feeding, plus one extra. Include a burp cloth for every two hours. * Clothing: Two full spare outfits in the blowout kit. Blowouts are a frequent reality at this stage. * Extras: Multiple pacifier backups, a swaddle, and a portable white noise machine can be lifesavers.
Toddlers (6+ months) need less frequent changes but more engagement and snack management. * Diapers: One diaper for every two hours out is usually sufficient. * Feeding: This zone expands with spill-proof snack cups, a water bottle, and bibs. * Entertainment: A small toy or board book occupies its own mini-pouch. * Containment: The wet/dry bag in your blowout kit gets more use for soggy clothes and leftover food.
The principles of the 4-zone system stay the same. Only the quantities and a few item types shift. This is why a flexible bag with adjustable compartments wins.
Maintenance: The Habits That Keep It Working
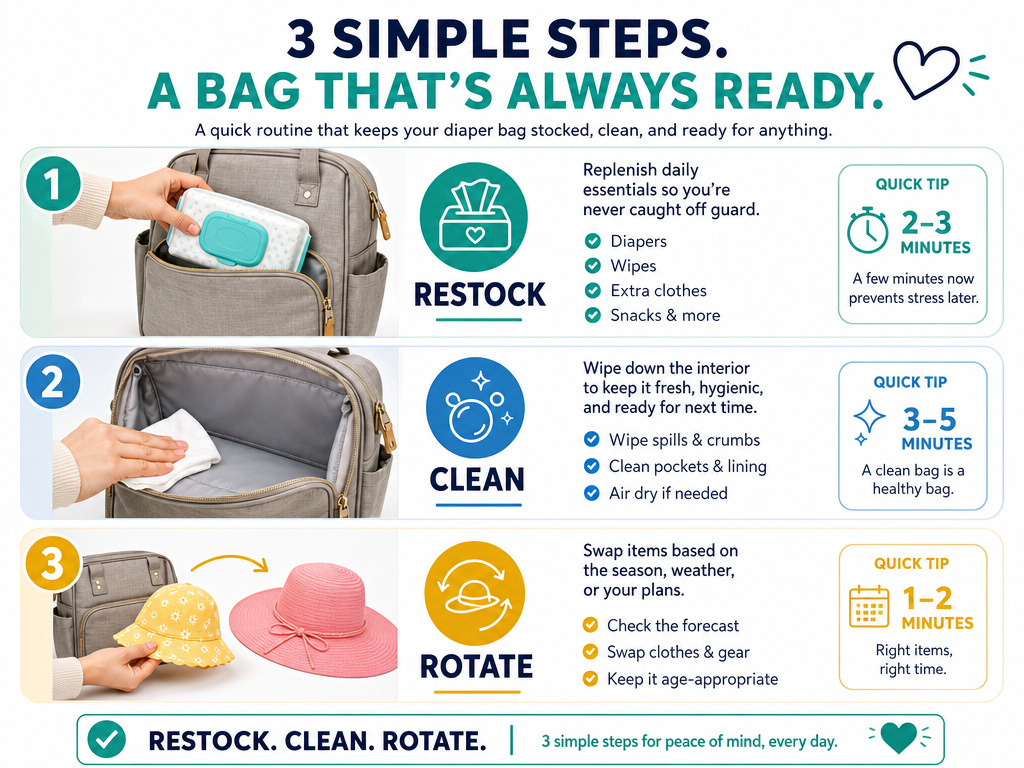 An organized bag is a maintained bag. These three habits prevent the slide back into chaos.
- Restock immediately after every outing. Do not put the bag away until the zones are refilled. This takes two minutes and saves twenty minutes of frantic packing later.
- Clean the bag weekly. Empty it completely. Wipe the interior with a mild soapy cloth, paying attention to crevices. Let it air dry fully before repacking.
- Seasonal rotation. Every three months, do a full audit. Swap out clothing sizes, update snack types, and adjust sun protection or outerwear.
Treat your diaper bag like a piece of essential gear. It’s not a catch-all sack. It’s a mobile command center for parenthood. The system works when you do.
Frequently Asked Questions
What is the most important thing to remember when organizing a diaper bag?
Physical separation of diapering and feeding supplies. This is the core of the 4-zone system and is directly supported by pediatric hygiene guidelines to limit germ spread. Keeping bottles and snacks away from diapers and wipes is more important than any specific brand of pouch.
How many diapers should I pack?
Use the hourly rule: one diaper for each hour you plan to be away from home, then add two extras as a buffer. For a newborn, err on the side of more. A three-hour trip needs five diapers. This prevents under-packing without overloading your bag.
Can I just use a regular backpack as a diaper bag?
You can, but you’ll need an organizer insert to create the necessary zones. A regular backpack typically lacks the compartmentalization and wipeable lining of a purpose-built diaper bag backpack. An insert like the BÉIS organizer creates the structure, making a good diaper bag out of any spacious pack.
What is a blowout kit and why is it sealed?
Blowout kit is a pre-packed, sealed pouch containing a complete spare outfit, extra wipes, and a wet/dry bag. It’s sealed to ensure the clean clothes inside stay clean and ready for a true emergency. If you use those clothes for a minor spill, you won’t have them when a major diaper failure occurs.
How do I organize a diaper bag for two children?
Double the core items but stick to one system. Use a larger bag, like a 30-liter backpack, and assign side compartments to each child or color-code your organizer pouches. The zones remain the same, you just have more diapers, more snacks, and likely two distinct blowout kits. The logic for packing a diaper bag for two is scaling the system, not inventing a new one.
The Bottom Line
Organizing a diaper bag is a system built on separation, of germs, of scenarios, of clean from dirty. The 4-zone method turns a black hole of baby stuff into a predictable toolkit.Start with a bag that has compartments, invest in a few key organizer pouches, and never, ever combine snacks with diapers. Your future self, fumbling in a parking lot, will thank you.
